Sunday, November 21, 2010

Dorothy Gale/Judy Garland costume

Hello world,

Lions and tigers and bears, oh my!

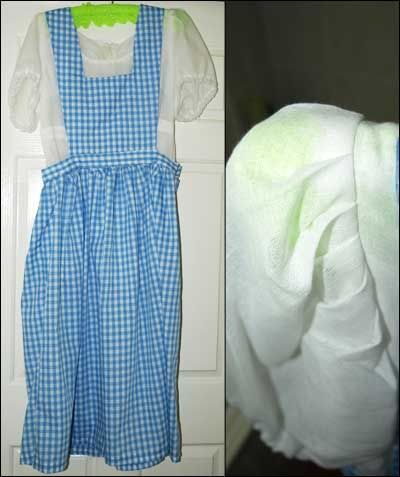
Yes, for my work xmas party the theme is superheroes and movie stars, and I am going as Judy Garland in the guise of Dorothy Gale from The Wizard of Oz. I just finished my costume:


Ah I love it! Costume making is the best. :)

So how did it all come together?


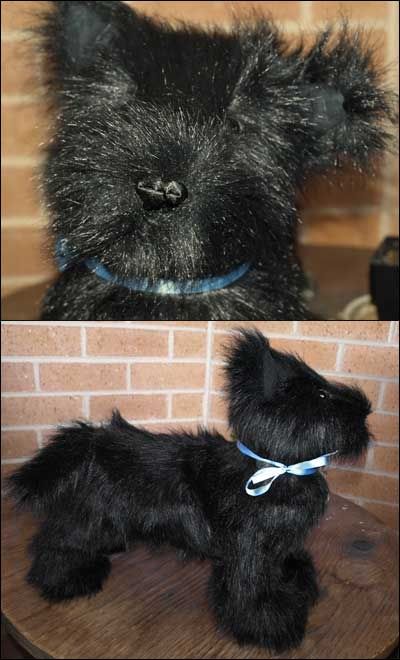
I finished Toto yesterday. I decided not to get a basket until I was sure what size he would turn out. I have some extra gingham left over, so next weekend I'm going to take him for a walk to the op shops around Sutherland to find a picnic basket that's the right size for him, and then I'll line it with the gingham. Perfect!

So, do y'all think I'll win the best dressed contest?


~Eyespiral

Meet Tess

Hello world,

I'm having a mini posting frenzy today as it's the first time in a while that I've had a chance to get down to business. :)

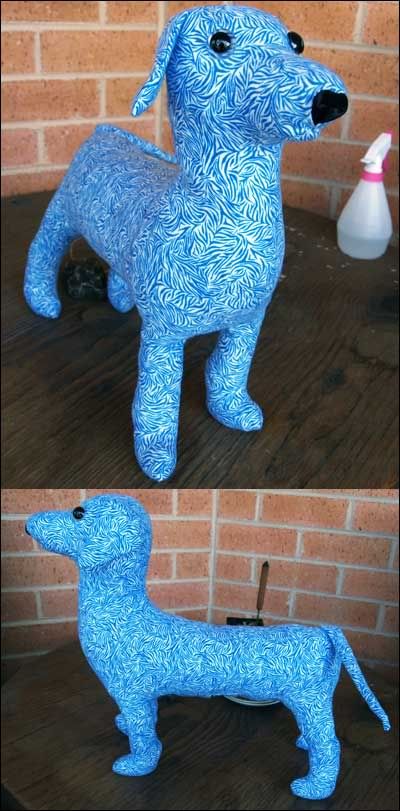
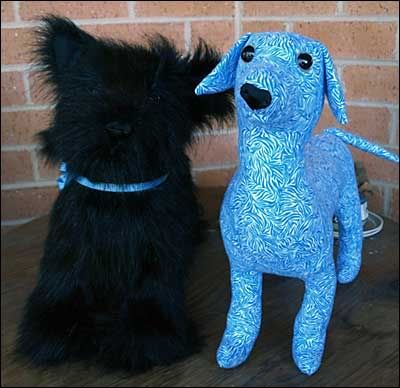
Today I'd like to introduce you to someone special: Tess dog.


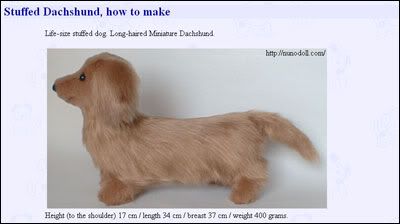
Tess came to life as an experiment to see if I could successfully alter the pattern for the life-sized dachshund from nunodoll:


Nunodoll is incredible. Definitely check him out.

As you can see, it was a success. Tess dog worked handsomely (she loves it when you coo over her!), and shortly received a younger brother, who was the reason for my experiment in the first place - explanation to come shortly. :)


~Eyespiral

Filet crochet portrait progress

Hello world,

I wanted this to be done soon, but as you will see from my progress below, it's slow goings. I knew it was ambitious, but I thought I'd be at least half way by this stage!

I have spent a number of days listening to my favourite TV shows and to some audiobooks while working on this, and I try to get at least a row done to and from work each day on the train. Apparently that is not enough. Nonetheless, I did foresee that problem and mitigated the risk by starting at the top, so the date was one of the last things I would crochet, just in case I blew out my deadline.

It is turning out really great, so the excess time is worth it.

MUM OR DAD, IF YOU ARE READING THIS, AVERT YOUR EYES IF YOU WANT THIS SURPRISE TO BE A SURPRISE, EVENTUALLY.

My progress after two months' work:


What did I tell you? surprisingly good. :) The little white things along the bottom are just stitch markers so that if I get lost I don't have to start counting from the beginning of the row... 300 stitches is too many for me to count back.

Here's another shot showing the detail of what the work actually looks like to me while I'm working on it. I only see it every now and again when I find the time to lay it out flat and review my progress.


So! Still a long long way to go, but I am encouraged by the result thus far. I'll post the final product up both before and after framing... whenever that may be.

Crochet cotton is from the lovely people at Crochet Australia, who you can hear about in a previous post.

Read my previous post to learn how to make your own filet crochet portrait from a photo:


Au revior,

~Eyespiral

Friday, November 19, 2010

The ultimate engagement ring - challenge 5

Challenge 5: Those three words

Vote for us and help us get engaged - we're in competition for the ultimate engagement ring!


Hello world,

Challenge 5 is to share the first time that either of us said 'I love you'. That was me. It is embarrassing and sickly cute. Forgive me by voting for us! :)

To learn more about the contest for the ultimate engagement ring, see my original blog post or visit www.my22ct.com.au

Here's our entry:

Jessica was always a pragmatic girl, and she thought teenagers who convinced themselves they could fall in love with their soul mate at age sixteen were rather ridiculous. But after a few months with EJ, she was becoming a hypocrite.

It had been about three months since they’d become a couple, and against her most logical self-arguments, she realised she was in love. So what did she need to do now? Tell him.

She always caught the late bus home so that they could spend a little time together after classes finished each day. It meant being stuck on the shoppers bus that crawled through town and got her home after 1.5 hours, but she always felt it was worth it.

This afternoon, they stood under one of the trees out the front of the school in each others’ arms. She had her cheek pressed firmly against his shoulder – she was too scared to lift her gaze.

Jessica was so nervous, in fact, that she couldn’t bring herself to tell him those three words in plain English. She and a girlfriend spoke a pretend language they called ‘Double Dutch’ throughout high school, and EJ understood it. Basically, it required you insert ‘vg’ at the front of each syllable you say.

It was hard. Scary. And so she stood there, face hidden in his oversized t-shirt, and told him, “Ivgi jvgust wvgantvged tvgo tvgell yvgou tvgat Ivgi lvgove yvgou (I just wanted to tell you that I love you).”


To help us win all you need to do is vote for us by clicking on either the ring photo or text links provided above. You need to log in using your Facebook or Twitter account and then you can vote for each challenge that we complete. Please try to vote for every one to give us this once in a lifetime chance!

Monday, November 15, 2010

The ultimate engagement ring - challenge 4

Challenge 4: Our meeting stories

Vote for us and help us get engaged - we're in competition for the ultimate engagement ring!


Hello world,

Challenge 4 is to share the story of our meeting - from each of our perspectives. It's not so differnt, actually... but I'll let you judge.

To learn more about the contest for the ultimate engagement ring, see my original blog post or visit www.my22ct.com.au

Here's our entry:

Jessica's story
The first time I heard his name was when we were starting year 7 and our entire grade were herded into the school hall to be separated into classes. His name made the school body froth when they heard it: Ebbenjay van der Hilst-Best. Like everyone else, I glanced up to look at the weird kid with the weirder name, and glimpsed a pale weedy boy with long shiny hair and a flushed face.

Three years later, I started seeing a boy who was a great mammoth of a nerd. He spent most recesses and lunchtimes in the computer lab, so I came along. As soon as I walked in the door, a lanky boy wearing a white shirt that hung from his frame like a sail from a coat hanger, and glossy hair that was now cut short, took one look at me and burst out in derisive laughter at his friend’s new girlfriend, the small exertion driving a rosy flush up his neck and cheeks. I walked out and refused to come back for all of lunchtime.

Eventually we started to sit together at recess and lunch, and eventually we got to know each other. That’s how we met.

EJ's story
When I first saw Jessica in early high school I knew she was smart. She looked like your stereotypical bookworm. She had long curly hair and big round glasses. She was pretty too, though she hid behind her glasses. I wanted to talk to her and get to know her but I was very shy.

After I found out that she was a friend of a friend of mine, I found the excuse I wanted to approach and talk to her. Then another friend of mine asked her out. I got mad at him: being in high school, I thought everything lasted forever and so I thought, ‘well, there goes Jessica’.

Fortunately, they didn’t last. I started spending recess and lunch times with Jessica’s group of friends so I could spend more time with her. After a while her friends and my friends started hanging out together and that’s when we really started getting to know each other.


To help us win all you need to do is vote for us by clicking on either the ring photo or text links provided above. You need to log in using your Facebook or Twitter account and then you can vote for each challenge that we complete. Please try to vote for every one to give us this once in a lifetime chance!

Monday, October 25, 2010

The ultimate engagement ring - challenge 3

Challenge 3: Our secret pet names

Vote for us and help us get engaged - we're in competition for the ultimate engagement ring!


Hello world,

Challenge 3 is to share our secret pet names. I have to admit, they're not really secret - we've never had a problem embarrassing each other with silly names in front on our friends. :)

To learn more about the contest for the ultimate engagement ring, see my original blog post or visit www.my22ct.com.au

Here's our entry:

EJ:  Eb-joy van dan der Sprite
Me:  Dessikins

I often sing "Eb-joyful joyful, how I adore you...". He is my little sprite. And Dessikins? Well it's adorable too. Silly? Yes. Embarrassing? Probably they should be. Vote for us!


To help us win all you need to do is vote for us by clicking on either the ring photo or text links provided above. You need to log in using your Facebook or Twitter account and then you can vote for each challenge that we complete. Please try to vote for every one to give us this once in a lifetime chance!

Thursday, October 21, 2010

The ultimate engagement ring - challenge 2

Challenge 2: Our reason

Vote for us and help us get engaged - we're in competition for the ultimate engagement ring!


Hello world,

Challenge 2 is to tell the world why we deserve to win the contest. It also becomes our profile description.

To learn more about the contest for the ultimate engagement ring, see my original blog post or visit www.my22ct.com.au

Here's our entry:

When I sat down to start writing this, I decided to interview EJ. And when I asked, “Why do you think we should win the 22 carat engagement ring?”, I expected some strategic answer. But he just smiled bashfully, lowered his gaze, and said simply, “Because I want to marry you.”

It made my heart glow and my ears tingle.

It’s really that simple. We are in love. We were high school sweet hearts. We tell each other “I love you” at every opportunity, even after being together for nearly 9 years. We make each other laugh. We’ve worked hard for the life that we have, and our team name is our motto: Even if the world is against us, we will arise victorious.

We fit together like puzzle pieces, so we can rely on each other to get through anything. I’m creative; he’s logical. I sing away the silence; he enjoys his quietude. I run early; he runs on EJ time. I feel more myself around him; he sometimes forgets that we are really two separate people.

He adores me; I would lose myself without him.

Help us live the fairytale. Thank you!

~Jessica

To help us win all you need to do is vote for us by clicking on either the ring photo or text links provided above. You need to log in using your Facebook or Twitter account and then you can vote for each challenge that we complete. Please try to vote for every one to give us this once in a lifetime chance!

Tuesday, October 19, 2010

An entreaty: the ultimate engagement ring - challenge 1

Challenge 1: Our favourite photo

Vote for us and help us get engaged - we're in competition for the ultimate engagement ring!


Hello world,

I know it's very trite to use a blog to beg for votes for a competition, however I have to use every channel available to me! After all, the prize means we can get married!


The contest is being run by Michael Hill jeweller & they're looking for the world's best couple to be awarded the ultimate engagement ring - see picture up top! I definitely think we can be in the running because EJ & I fit so well together - but we need your support.

The contest involves a number of 'challenges' which the couple have to complete in order to win. The first challenge we had to complete was to upload our favourite photo as a couple. This was an easy decision for us - we both thought of the above photo immediately. It's a candid shot that was taken by a friend during photography class when we were in year eleven, and I developed the film and the print myself.

I love the way that behind EJ are the parallel structured lines of the bricks and behind me are the organic shapes of the trees - it's really representative of the two of us.

I will be posting a note on this blog each time we complete a challenge. To help us win all you need to do is vote for us by clicking on either the ring photo or text links provided above. You need to log in using your Facebook or Twitter account and then you can vote for each challenge that we complete.

Winning this contest would mean such a significant step in our life; we really are a great couple, and with your support we can do it!

Sunday, October 3, 2010

How to create a filet crochet pattern from a photo using Photoshop

Hello world,

For those who don't know, filet crochet is a type of crochet that is based on a mesh made of blocks that are either 'open' or 'closed'. Great for the mathematically minded like myself, and there are lots of tutorials online to show you how to get started with this. It can be done using larger hooks and thicker yarn to create blankets, or fine hooks and yarn to create something more akin to lace.

I have been searching for a tutorial on how to covert a photo into a filet crochet pattern and I couldn't find one, so I've decided to write one of my own! Read on to learn how to achieve this.

Before & after


There are processes for creating a colour crochet blanket, etc, from a photo, however this is not what I wanted to do. I not-so-recently completed a gorgeous peacock filet crochet in Coates Mercer 100 cotton that once belonged to my great grandmother and it is just so lovely that I wanted to see where I could go with it. Unfortunately my drawing skills aren't amazing like my brother Michael, so I needed to use my Photoshop skills instead of manually reproducing the photo. Oh, and I'll post a photo of the peacock soon.

I came up with the process because I am thinking of making an epic xmas gift, but because the person for whom I am making it may read this, I will say no more - for now. I wanted to make a filet crochet pattern from a photo. This is difficult for a number of reasons: Photos are high definition, they're in colour, and it is surprisingly difficult to figure out how to convert an image from colour to black & while only (i.e. with no greys).

However, I am determined, and like Photoshop, so here is the tutorial. I hope someone else out there on the world wide web finds it useful. :)


Step 1: Source your photo
Get your photo or image. Low-res is fine as filet crochet, unless making one of epic proportions, is also quite pixelated. What you want to focus on are images with high contrast. Striking patterns such as stripes, etc, are great for the background if you want them, but again contrast, not colour, is the key.

For this tutorial, I chose this loverly photo of my brother Tim, breaking most of the rules above. Not to worry, I embrace a challenge!

Original photo


Step 2: Adjust and convert to greyscale
This step is about your own judgment. There's lots you can do to get the best outcome, but at the most basic here's what to do: Crop as much as you can. Don't waste space with background if you don't need to unless you have plenty of time and yarn on your hands, else you will regret it later. Then select 'Layer > New Adjustment Layer > Black & White'. Fiddle around with the various sliders to get the effect that you want - remember you want to maximise whites, blacks, and have minimal greys.

I have Photoshop CS3 and I understand the 'Black & White' feature doesn't exist on some earlier version of Photoshop - in this case, select 'Hue/Saturation' instead and also create an additional 'Brightness/Contrast' layer to give yourself more control.

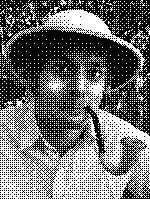
As I said, there are lots of things you can do to further enhance your image at this stage. To get the below image, I used 3x brightness/contrast layers to improve the definition of the end of the pipe and the overall contrast of the image, plus I used the burn/dodge tool to add definition at the brim of his hat and the eyes, then used the black & white adjustment layer and played with the sliders.

Greyscale photo


Step 3: Resize
At this stage you need to decide how large and how detailed a crochet pattern you want - each pixel becomes an open or closed block in the filet crochet mesh. The smaller the image resolution, the faster and easier crocheting it is, but the larger the better detail you get. To give you a notion of size vs. pixelage, I am currently working on an image approximately 300 x 150 px using a tiny crochet hook and size 100 yarn and it is looking to turn out about 1 x 0.5 metres in size, so look out.

For this tutorial, I resized the image to 150px width. Lower would lose too much detail and leave me with a greyish mess. I noticed my contrast wasn't great, so I decided to zoom right in and do some more work with the dodge/burn tools to improve the contrast I wanted. I know the below may look silly, but the end result can be greatly influenced by the modifications you make here.

To resize an image in Photoshop, select 'Image > Image size...' and input the settings you desire.

Pixelated adjustments


Adjusted small


Step 4: Convert to halftone
The bitmap halftone screen is how to reach a workable filet crochet pattern. To do this you need to complete two steps:

  • Select 'Image > Mode > Grayscale' and click OK to flatten and discard all colour information.

  • Use Image > Mode > Bitmap', leave the resolution as is and select the 'Halftone screen' method with the below settings, or download my settings and load them into Photoshop:

    Halftone settings


Click OK and in essence you've got your pattern. Here's mine at both 100% and zoomed in so you can see the pattern better.

100%


Zoomed detail


Step 5: Save the image

Press Ctrl+Alt+Shift+S to bring up the 'Save for web' or 'Save for web and devices' dialogue box. Save the image as a GIF file and it'll have a tiny file size due to being plan black & white. There's no need for transparency.


Step 6: Print and add grid

If you're nifty and/or OCD like myself, you can add a grid and resize the image before printing. However, in hindsight it is much easier to do it using the built-in Windows print picture function and add the gridlines yourself.

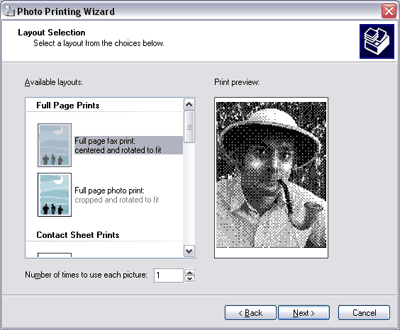
To print the image ready for use, go the the folder where you have the image saved, click the file so it is selected and then select 'Print this picture' from the folder options

Print picture


Then follow the prompts. When it gets to the 'Layout selection' step, select 'Full page prints' as shown below.

Full page prints


The image will print and really you can go ahead with just this. However, I always like to have my gridlines there to make sure I get the stitch count right, so to achieve this I recommend grabbing a mechanical pencil (for the fine tip and silver colour which will show up on both the black and white parts of the image) and a ruler and get to it. Another good idea is to rule a gridline of double thickness every 5 or 10 blocks to make keeping count easier.


Et voila!
You have now got a filet crochet pattern from a photograph. Congratulations! If you make one, I'd love to see! I promise I will post a photo of mine when it is done and gifted away. :)

Before & after


----------UPDATE JANUARY 2013----------

I ended up making this portrait for my brother for xmas just passed. Here's a photo of the finished product:


-------END UPDATE JANUARY 2013-------

Well I hope this was useful. Ooh, and if you're interested, here is a peek at the pattern for the peacock that I finished a while ago:


Peacock filet crochet


Au revoir!

~Eyespiral

Wednesday, September 29, 2010

Crochet Australia is excellent

Hello world,

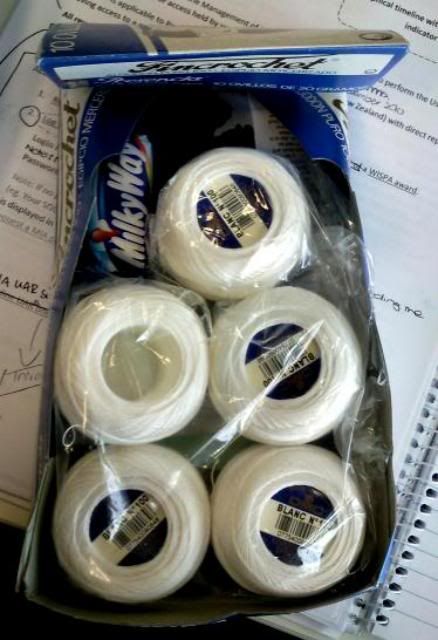
Just a quick note to say how excellent the people at Crochet Australia are. Not only do they stock all sorts of hard-to-find crochet yarn at their online store and respond to my email enquiries uberfast, look at the surprise that came in my package today!


Just what I needed!

~Eyespiral

Monday, September 20, 2010

Bridestorm

Hello world,

This past weekend we went to a friend's wedding and it was fabulous. It showed me that all the little finniky things that I would worry about don't matter all that much - that only my mum and any future brides would even take notice of a lot of the details that I might spend hours fussing over. Because Paul and Julie are sensible practical people, not crazy high-strung overthinkers like me, and I thought their day was so lovely. I guess it just reminded me that the big picture is what's important.

Planning a wedding is such a big part of the fun (and heartache) leading up to the big day. As I was walking to the station this morning I was thinking about something I'd like to do shortly after I get engaged: a bridestorm. I am positive the concept is alive and breathing around the world, but I feel the need to blog it as though it is a new innovation.

It's about bringing together all the girls (and any guys who are willing!) to start chit-chatting about wedding ideas. Getting mums and aunts and sisters and married friends and unmarred friends to bring along their ideas and things they love and things they know didn't work and flipping through bridal magazines and putting up all sorts of wedding blog ideas on the TV while we drink champagne and munch down with no concern for diet sounds like a lot of fun to have with a bigger group than the bridal party and long before the hens night or even the bridal shower. The best part is everyone can feed off each other for great ideas but with the big group you're not under the pressure to agree to everyone's suggestions - it's an opportunity to share ideas before you commit to any.

What do people think of this concept? Is it a good idea or am I stepping on the toes of the bridal shower?

~Eyespiral
Thursday, September 9, 2010

A quick idea to liven up the loo

At my work every time I go into the loo I read the message from the cleaning staff. I can’t even tell you how many times I have read it from top to bottom. It’s ridiculous. But as with many people, if there are words in front of me, particularly if I am sitting there with nothing to occupy me, I automatically start running my eyes over the words.

So I know it’s not a new innovation to stick stuff on the back of the toilet door. Parents have been doing it for years with multiplications tables and alphabets for their kids. But I just thought – you know what would be good? If I could read something a bit more stimulating. So why not?

I think that decoupage is the answer. But not using pictures of flowers and cherubs and so on. Why not use the pages of books? Or even play scripts? If you picked up a couple of tattered copied of Hamlet from the school’s junk sale, or found a worn out book of poetry that couldn’t be salvaged even with ohdeeoh’s excellent hardcovering your favourite softcovers solution, then why not chop off the margins and paste it up on the back of the loo door, or if you are a renter like me, on a backboard which can be hung from a convenient hook?

I’m liking this idea a lot and I think I’ll go ahead with it if I discover some free time I’m not aware of. Plus if you get tired of what’s there, you can re-decoupage it all over again!

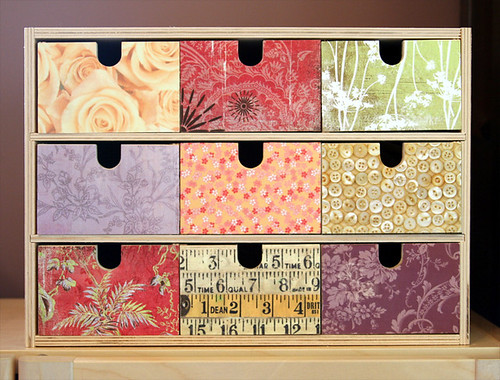
Some inspiration - click the image to go to the source. :)

Donation to Decor


Trans-craft-inental


not beige


~Eyespiral
Tuesday, September 7, 2010

Revived favourites: hardcovering old paperbacks

Hello world,

I love this tutorial by ohdeeoh on turning old paperbacks into custom hardbacks. I'm sure there's a number of titles in my bookshelves that could do with a loving revamp. And how lovely would custom covers be when you find a sad copy of an excellent book at the white elephant stall on the weekend?

I'd love to get my genius artist brother to draw illustrations for worn out books and recover them as gifts, that'd be wonderful. Ooh the blogosphere is so full of good ideas!

ohdeeoh's recovered paperbacks

Sunday, September 5, 2010

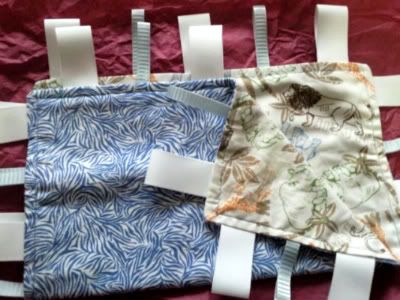
Animal-themed tag blanket for a baby boy

Tag blanket


I whipped this one up quickly overnight to give to a colleague who is disappearing into maternity leave shortly - though it was difficult to part with, I'm comforted by the fact that I have enough of the fabrics to make another if I want. :)

~Eyespiral

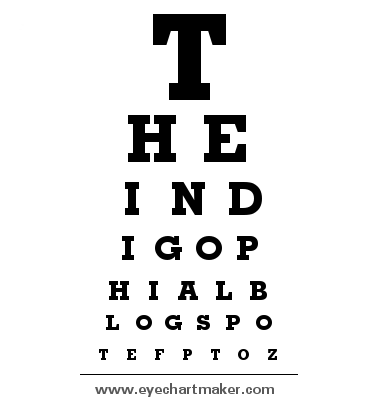
Custom eye chart generator

Indigo phial eye chart


www.eyechartmaker.com

Monday, April 19, 2010

A zine a day... my idea

I've been concerned about staying creative in the face of full-time work. I made a deal with one of my friends who studied creative writing with me to exchange a chapter per month of our novels, which was a great idea--it made us both accountable. It worked for the first month; then Lids' kitchen burnt down and threw our schedule hopelessly off course. Today was the day we were meant to make our second exchange, but I have to begrudgingly announce that I have written absolutely nothing over the past month (and nothing whatsoever of mine has burnt down, so I have no excuse). I guess knowing that Lids would be out of whack and not waiting to receive my raw prose was enough to eliminate any drive I had.

Last night, however, I jumped online to watch the following YouTube clip by SamProof, which I'd come across probably 18 months ago.


After watching it I folded, chopped and composed a cutesy little zine on black paper with white ink for EJ. It took about 10 minutes.


You see, the Sydney Writers Festival is on in May. Last year I went to its Zine Fair and while some of the content was less than impressive, the drive that some of these writers had to keep producing zine-able work amazed me. Ever since making Fervourography I've wanted to keep self-publishing but I've yet to complete any writing that I deemed worthy.

What If I skip the middle-man? What if, instead of waiting until I have a piece of writing I feel is 'ready', I commit to actually making zines and spend less time worrying about the content? It will force me to find a topic and write a tiny bit every time. Channelling creativity at this stage may be more important than meaningful content and besides, these little 6-pagers are just a bit of fun.

So I'm thinking of starting another blog: azineaday or mydailyzine or zinedejour, or something along those lines. Yes, I'm falling into step with the many bloggers who say they're going to take on some task every day for a year. Why not? Committing to you, an online audience, will spur me to keep my promise - it is extravagantly unlikely that everyone online's kitchen is going to burn down at the same time and let me off the hook!

Any thoughts would be welcome. In the mean time, I'm off the stationers to get some paper.

~Eyespiral
Sunday, January 17, 2010

Trading Cards

Hello world,

Quick links:
Thanks for visiting! You've come here either because you read my blog or because you've gotten hold of one of my artist trading cards and want to find out what it's all about. So if you're new and want to hear all about it, click here to get the rundown.

Below you will find a list of all our trading cards by number, and you can click on the number to be taken to that card. Alternatively, you can view my trading cards gallery for your card and click on it to visit its page and view its map.


How to log your find

You can log your find by posting a comment stating the type of trading card (Arise_Victorious or Eyespiral), its number, the date, plus any or all of the following information: where you found it, where it is now/where you left it, your name/username, a link you might want to pimp (e.g. your geocaching profile, your own website), and a link to a photo if you'd like me to include it in the map point. If you've found or left it in a geocache, feel free to post a link to the cache you found/left it in.

As I receive these comments, I will update the post with the new locations of the cards.

Arise_Victorious geocaching trading cards

1, 2, 3, 4, 5, 6, 7, 8, 9, 10, 11, 12, 13, 14, 15, 16, 17, 18, 19, 20, 21, 22, 23.


Eyespiral's artist trading cards

1, 2, 3, 4, 5, 6, 7.


The Rundown

I've been inspired. After running into the idea for artist trading cards on this Burdastyle post and further learning about them on the Artist Trading Card Committee site, I decided these were definitely for me. Since my medium of choice right now is fabric, and since we've gotten into geocaching lately, and since my drawing skills are severely limited, it made sense to make sewn trading cards. In geocaching, it's an advantage if you choose to leave something waterproof (just in case the cache leaks), and fabric will survive. Thus came the evolution of Arise_Victorious geocaching trading cards. These are ones that EJ and I will leave at geocaches that we find during our adventures, and the ones which I hope will make amazing journeys around the world that I'll get to hear about.

Additionally, I plan to make my own ones, Eyespiral's artist trading cards, which I will trade or give in the normal manner.

Here's what the backs of the two different types of trading cards look like. On the left is an Arise_Victorious trading card, on the right an Eyespiral one. You can see the card number in the top right corner of the card.
Types of trading card


The big idea: I want to know where our trading cards go. Geocaching is familiar with trackable items, which you can purchase and track on their website, but I want ours to be our very own. So when you find one of our trading cards, you will find both the URL for this page and our email address. Then you'll either post a comment on this post or email us about your find, and when I receive them I will add your location (and name or username, if you so desire) and the date to the list underneath the photo of that trading card. That way I can keep track of all the trading cards I have put out there as well as the journeys they've taken. And you get to see where they've gone, too!

If you'd like to trade or would simply like me to post one of my Eyespiral cards to you, comment on this post with a way for me to get in contact with you to get the postal details. :)


Thanks for taking part and I hope you're inspired, too!

~Eyespiral

Friday, January 8, 2010

Geocaching

Hello world,

I can't believe it, two posts in as many days? Is there something wrong with me? No. I just have had two different topics to post and, surprisingly, enough spare time on two consecutive days to allow me to actually post them. Unfortunately for the crafty creatures out there, neither the last nor this post contains any new projects or tutorials to display: my sewing machine, crochet equipment and all crafty goods have been packed up in preparation for our move on Monday.

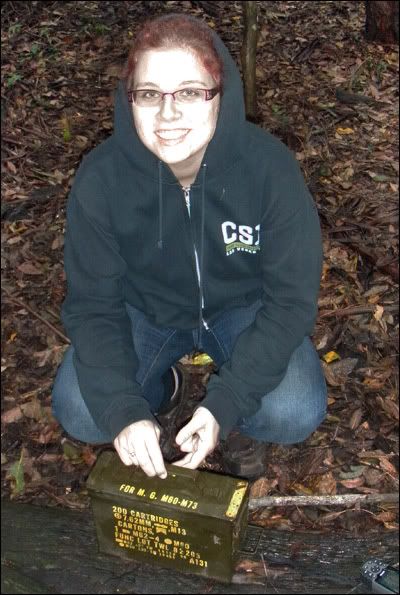
My latest obsession? Geocaching. EJ got a handy-dandy handheld GPS (the kind you use for bushwalking) for his birthday and since then we have been busy seeking out a number of the sneakily hidden geocaches around our area. Here's a picture of me with a geocache we discovered on Sunday:

Jessica at Sneak Peak


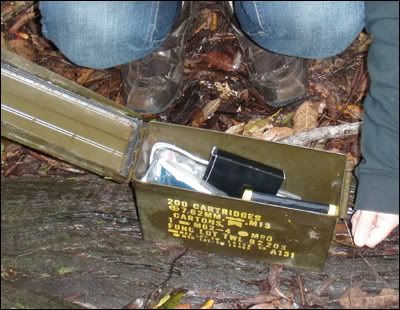
Geocaching is great fun and the best part is that it gets me outside and exploring the area, not to mention the exercise which I don't treat as cruel and unusual punishment because I am distracted by the thrill of the hunt. The basic idea is a follows: Someone with a GPS makes up a cache, which consists of some kind of waterproof container with at least a logbook inside for people to sign when they find it, and hides it away in a secret location (of which they record the lat and long coordinates) where people oughtn't find it by accident. They may also include trade items which can be anything that will fit in the container (marbles, playing cards, toy cars, skipping ropes, stuffed animals, mini compasses, pocket radios - these are all things we've found in caches). They also often include a special prize for the first person to find the cache. They then post up the cache's information on www.geocaching.com.au or www.geocaching.com, and after it is reviewed to ensure it is not in a banned area (in Australia geocaches are banned in national parks) the cache is listed on the site for anyone to look up and find. When you find the geocache you sign the log, and if you want to you can leave a calling card (we've been leaving mini slinkies, coloured plastic sea creatures and glass hearts). You can also take an item from the cache, as long as you leave something of your own to replace it. Here's a picture of me opening the above cache:

Geocache contents


It's a really exciting hobby to get into and one that's open to anyone who is interested. All you need is a GPS (often car GPSes will also allow you to input latitude and longitude coordinates, so you may not even need to buy a new piece of equipment) and some motivation - or if you're really keen but can't afford a GPS, you could try relying on GoogleMaps's satellite/street map hybrid to locate the cache you're looking for!

So here's my question to the people who stumble across this post and make it all the way down here without getting bored: should I make a crafty cache of my own? I am planning on placing my own cache in the near future - hopefully before the end of the month, since I'm starting full-time work on 1 Feb and will have less free time available for creativity. But what I wonder is if anyone thinks it will be worthwhile for me to make a special crafty prize for my first to find (FTF)? Something like a peg buddy or a diary cover - I even discussed with EJ making a specialty geocaching logbook with a sewn cover (as I so often do) and with the pages all prepared for listing caches you're searching for, ones you've found and when, and what you left and took from each one. Maybe I could make one for me and one for a special FTF? I guess what I really want to know is if anyone would be interested in getting the coordinates for this special geocache with a crafty prize for the FTF. Anyone? Comment below.

I am also planning a couple of exciting items to make for our own calling cards once we're moved and unpacked. I have been planning on making some sewn trading cards (à la these) for a while now, so these would both busy my idle hands while watching TV (otherwise I use them to stuff food into my mouth) and be a great item to leave in geocaches we visit, not to mention include with gifts or items which I sell in my ebay shop (which is currently inactive due to my busy busy lifestyle :) ).

The other idea I am excited about is to print out either a short story or poem (something that will fit on one page, preferably), cut it into pieces (I haven't decided if it should be sentences, paragraphs, lines or random angular puzzle pieces), laminate them (to protect them from the weather) and leave a note on the back explaining the point (which I will explain in a moment). Then I'll drop off different pieces in different geocaches so that when people find them they can either collect them and relocate them elsewhere or copy down the section they have found, in order to eventually make up the complete piece of writing. If I wanted to be doubly tricky, I could include within the piece of writing the coordinates to a secret cache so that they can find it only after they have completed the puzzle. I could make multiple copies of the same one so that if one piece got lost along the way it wouldn't be impossible to complete it, and that way I would be getting my writing out there in a really unique way and also presenting a new challenge to the geocaching community!

Alright, I need to calm down and finish my jobs around this house before we move. Please comment and tell me your thoughts!

~Eyespiral

Thursday, January 7, 2010

Hunt the Wumpus, (evoke), Wumpus Noir, and Wumpus Intergalactica

Hello world,

Now that the hubbub of xmas has passed, I've found a few moments to upload the four versions of Hunt the Wumpus that I mentioned in my pre-xmas post.

Hunt the Wumpus is an old computer game, originally text-based when it came out in the 70s. During my last programming subject at uni - CSCI337 The organisation of programming languages - we had four assignments in which we were to develop Hunt the Wumpus using a different programming language and programming paradigm each time.

I just signed up to MediaFire and uploaded my files and so I'll explain how to run each one in a Linux environment like Ubuntu. You will have to download a couple of packages (as I will instruct) for my games if you do not already have them installed. These games should all also run in a Unix environment and in some cases will do so more easily, but I will only give the instructions for Linux and those Unix users can figure out the differences themselves. :)

Scroll down to view each set of instructions in turn, or click on the name of the Hunt the Wumpus you're interested in below to jump to that one.


Hunt the Wumpus - Lisp (Functional paradigm)
This is basically the original game as from its creator (Gregory Yob), but programmed in Lisp rather than BASIC.

  1. Click on the name of the game above or click here to download the file. Choose to save it rather than open it in a text editor. Remember where you saved the file.

  2. Open terminal and navigate to the folder containing the file you just downloaded. You should be able to see ass3.lisp in the list of files in the current directory when you type ls at your terminal command line.

  3. In order to play the lisp version, you will need to download and install the clisp package. To do this, enter the following into your terminal command line and follow the prompts:
    sudo apt-get install clisp

  4. Now that you have clisp installed, run it by typing clisp into your terminal command line. The programme will display a header and all will be beautiful.

  5. Type (load "ass3.lisp") to load the game file.

  6. Type (wumpus) to start playing the game. Enjoy!

  7. After you have finished playing Hunt the Wumpus and have quit it, you will still be in clisp. To quit this, type (bye). You will be returned to the terminal command line interface.


Hunt the Wumpus (evoke) - Fortran (Imperative paradigm)
This follows the same narrative of the original game and the same rules/events/hazards, etc, but I rewrote the story to be a bit more evocative. Programmed in the dinosaur language Fortran77.

  1. Click on the name of the game above or click here to download the file. Choose to save it rather than open it in a text editor. Remember where you saved the file.

  2. Open terminal and navigate to the folder containing the file you just downloaded. You should be able to see wumpus.f in the list of files in the current directory when you type ls at your terminal command line.

  3. You will need to install the package gfortran, a fortran95 compiler. The assignment required me to programme in fortran77, unfortunately however Ubuntu does not support a fortran77 compiler like g77. Since fortran95 is an extension of fortran77, gfortran still correctly compiles g77 code - the problem that most of my fellow programmers had was that they used functionality that did not exist in 77 and so they lost marks for failure to compile.

    You need to type the following into your terminal command line and follow the prompts to get and install gfortran:
    sudo apt-get install gfortran


  4. Compile the wumpus.f file by entering the following into your terminal command line:
    gfortran wumpus.f

  5. Now when you type ls into your terminal command line it should list both wumpus.f and a.out. To run Hunt the Wumpus (evoke) type the following in at your terminal command line:
    ./a.out

  6. Enjoy the game! If you'd like to quit mid-game, use Ctrl+C.


Wumpus Noir - Literate C++ (Literate paradigm)
Here is where I start to make it a bit more fun! The Wumpus is now a mafia boss, and you are a detective on his tail. It was great, though my darling Karina pointed out after I'd finished that I'd consistently spelt labyrinth incorrectly the whole way though - 'labarynth'. Not to worry. Anyway, this one is using C++ and the literate programming paradigm, one that is very smart and really ought to be used all the time, in my opinion! It forces you to document your code, something which future programmers will thank you for.

Literate programming allows you to generate both a machine-compilable file and a human-readable pdf file from the original web file. I will give you instructions on how to generate both before running the game.

  1. Click on the name of the game above or click here to download the file. Choose to save it rather than open it in a text editor. Remember where you saved the file.

  2. Open terminal and navigate to the folder containing the file you just downloaded. You should be able to see wumpus.w in the list of files in the current directory when you type ls at your terminal command line.

  3. In order to process the wumpus.w file, you will need to install cweb. Click here to get cweb and install it as per the instructions.

  4. You will also need to download and install pdftex in order to generate a pdf. Click here to download and install it.

  5. Finally, you will need to install 'build-essential', which contains a number of essential development tools that are used for compiling C and C++ files. Type the following into your terminal command line and follow the prompts to get and install build-essential:
    sudo apt-get install build-essential

  6. Now we can get down to business! First, type the following into your terminal command line to prepare to create the pdf file:
    cweave wumpus.w

    This will have generated a collection of different files.

  7. To generate the final, readable pdf file, enter the following at your terminal command line:
    pdftex wumpus.tex

    You will now find a file called wumpus.pdf in your current directory which documents how I developed this particular version of the game.

  8. To generate the compilable version of the game, type the following into your terminal command line:
    ctangle wumpus.w

    This will create the file wumpus.c in your current directory.

  9. Since I work in C++, not C, you then need to convert this into a C++ source file. To do this, enter the following into your terminal command line:
    mv wumpus.c wumpus.cpp

  10. Nearly done. Now to compile the C++ source into an executable, enter the following:
    g++ wumpus.cpp -o wumpus.out

  11. To execute the final game file, type the following into your terminal command line:
    ./wumpus.out

  12. Enjoy! If you wish to exit mid-game, you can do so by pressing Ctrl+C.


Wumpus Intergalactica - Prolog (Logical paradigm)
Finally, we have the sci-fi variation. You are a bounty hunter off to neutralise the Wormhole Union of Marauders, Pirates and Unsavoury Scoundrels, aka the WUMPUS. Written in the very frustrating logic language Prolog. While nowhere near the insanity of Lisp, this language is tricky to get used to, and should be left for AI and not games.

  1. Click on the name of the game above or click here to download the file. Choose to save it rather than open it in a text editor. Remember where you saved the file.

  2. Open terminal and navigate to the folder containing the file you just downloaded. You should be able to see wumpus.P in the list of files in the current directory when you type ls at your terminal command line.

  3. You will need to download XSB in order to run this game. Click the link to go to their website and follow their instructions to download and install XSB. The game will run with XSB 2.6 and up. Remember where you unpacked the file to; I put mine on the Desktop.

  4. Now you need to run XSB without leaving the directory where you have wumpus.P saved. To do this you need to type the absolute address of the XSB executable into your terminal command line. The XSB executable will be located the the XSB folder you saved, in the bin subfolder, and it will be named 'xsb' (note the lower case). For example, to access my XSB, here is what I typed:
    $HOME/Desktop/XSB/bin/xsb

    Once you have opened XSB it will display its header in the terminal and you will be ready to load the prolog file.

  5. Load the wumpus.P file by typing the following:
    [wumpus].

    Don't forget the '.' at the end of the command, otherwise XSB will keep hanging, waiting for you to finish your command!

  6. Run the game by typing the following :
    go.

  7. Enjoy!

  8. In order to exit XSB once you have quit Wumpus Intergalactica, type the following:
    halt.

    You will be returned to the terminal command line interface.


And there you have it, four varieties of Hunt the Wumpus. I hope the sparse few who find this interesting enjoy playing my own personal spin on the game, and that those that stumble upon this in search of help with the programming languages used herein find the code useful to help them learn. :)

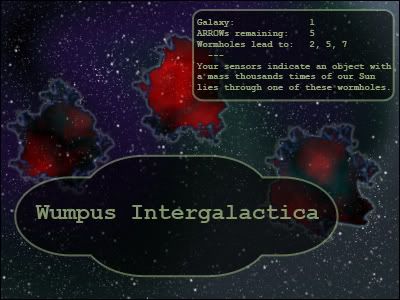
Just for funzies, I made an image to go with Wumpus Intergalactica. I actually made it because I was originally going to post the game files for download from deviantArt, and I wanted a thumbnail image for them, but I only made this one before I changed my mind and when with MediaFire. Anyway, here it is:

Wumpus Intergalactica image


I altered it a little so it would suit the narrow size of this blog post, but if you click on the image you can see the original 640x480px version.

~ Eyespiral
A note to all those would-be code plagiarisers: If you are planning on ripping off my code for the same class at UOW as I took, be warned - I don't doubt that Ian will remember these particular assignments. So be smart, and only use them to help you understand the languages and as a reference while you are building your own programmes. Toodloo!