Showing posts with label make. Show all posts

Saturday, March 12, 2011

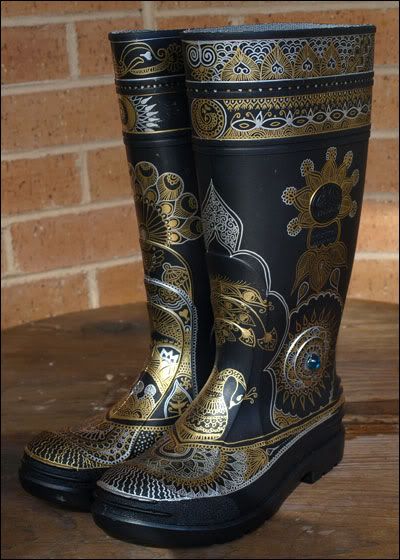
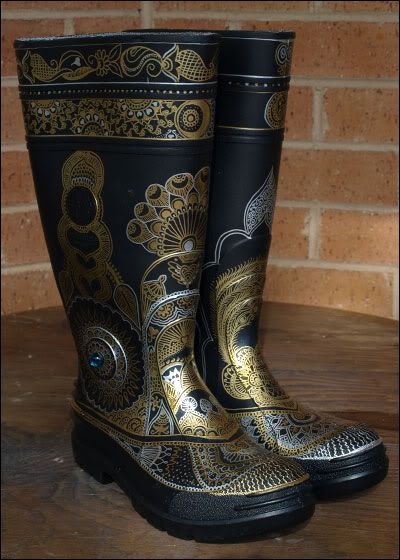
Custom gold and silver henna patterned gumboots

Hello world,


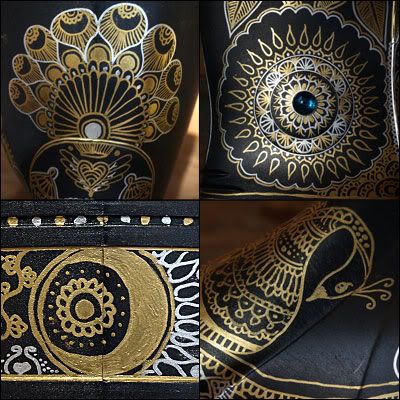
Here they are! My beautiful custom gumboots. I may even do some more work on them in the future... depending on how I feel. There's space for more but I do love them as they are.

To replicate these all you need is:
  • A clean pair of gumboots - I picked up my pair from Bunnings for $20
  • One or more permanent paint markers with a fine nib - I used gold and silver Artline 999XF with a 0.8mm nib
  • And internet connection or a library where you can look up examples of the many and varied awesome henna patterns... or, you know, innate artistic talent (I went with the internet connection and the library books as my Mum funnelled all of her drawing talent into my little brother Michael)

I also used a couple of stick-on jewels I had left over from my cake pop bouquets a few years ago. If you're planning on adding anything like that, I suggest using construction adhesive (in careful quantities) because hot glue won't stand the elements (Selleys in a good brand; they even have one specifically for rubber).

Method: Just go for it! Hmm, but if you're concerned about not getting it right first time, I'd recommend first doing some practice on paper. e.g. I made one of my zine-per-diems just henna patterns - they're fun, pretty, easy even if you're not good at drawing, and you end up feeling quite calm and tranquil while you're doing it.

For a great resource on the mechanics of drawing henna patterns, as well as examples of some masterpieces and descriptions of the different styles of henna around the world, check out The Henna Page.



What's the story?

I decided to make these beautiful gumboots for an adventure EJ and I were planning - foraging down an old abandoned train tunnel at Helensburgh. We originally discovered the place while geocaching - Dub Side of the Moon is hidden sneakily at the mouth of the dreamy location. Take a look how romantic a scene it is:


Sorry for the low-quality image - we left the photo-taking 'til the sun was high in the sky and it was a sweltering 40°C, making for harsh lighting conditions. That and trying to hash the image size down for the internet means this doesn't even show you a fraction of how beautiful this place is - if you're anywhere nearby, go and check it out!

Inside there was an escape from the stifling heat, not to mention a canopy of glow worms that have aligned themselves with the old brickwork. The mud is the perfect thick glompy kind, and you see frogs hopping around and other creatures too.

The mud was the reason we left exploring the tunnel for another day - giving me a week to make these babies! Below is a comparison - my gummies in their, uh, natural habitat on the left, and on the right, after our adventure.
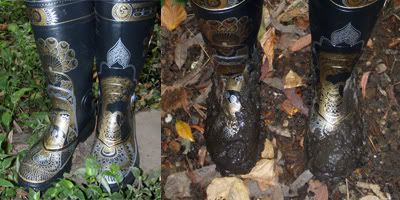

Yes, they survived. The mud came off easily, and any spots that had dried too much to come off under running water were easily removed with a soft damp cloth. In face, the walking and the cleaning didn't affect the drawn-on patterns at all. Success! The only smudge is from where EJ's ridiculously heavy torch was resting on them in the bag on the way home.

OK, I won't post any more pictures (I have roughly 100... yes I always take things overboard).

Au revoir,

-Eyespiral

Sunday, November 21, 2010

Filet crochet portrait progress

Hello world,

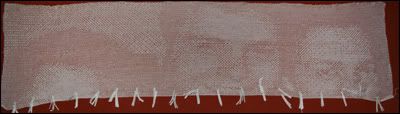
I wanted this to be done soon, but as you will see from my progress below, it's slow goings. I knew it was ambitious, but I thought I'd be at least half way by this stage!

I have spent a number of days listening to my favourite TV shows and to some audiobooks while working on this, and I try to get at least a row done to and from work each day on the train. Apparently that is not enough. Nonetheless, I did foresee that problem and mitigated the risk by starting at the top, so the date was one of the last things I would crochet, just in case I blew out my deadline.

It is turning out really great, so the excess time is worth it.

MUM OR DAD, IF YOU ARE READING THIS, AVERT YOUR EYES IF YOU WANT THIS SURPRISE TO BE A SURPRISE, EVENTUALLY.

My progress after two months' work:


What did I tell you? surprisingly good. :) The little white things along the bottom are just stitch markers so that if I get lost I don't have to start counting from the beginning of the row... 300 stitches is too many for me to count back.

Here's another shot showing the detail of what the work actually looks like to me while I'm working on it. I only see it every now and again when I find the time to lay it out flat and review my progress.


So! Still a long long way to go, but I am encouraged by the result thus far. I'll post the final product up both before and after framing... whenever that may be.

Crochet cotton is from the lovely people at Crochet Australia, who you can hear about in a previous post.

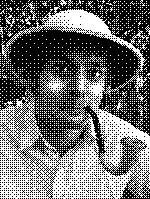
Read my previous post to learn how to make your own filet crochet portrait from a photo:


Au revior,

~Eyespiral

Wednesday, December 23, 2009

Xmas crafts! Seatbelt covers, sewn luggage tags, laptop sleeves, crochet Rorschach mask, diary cover, eye mask and peg buddies.

Hello world!

Here's a quick post of the xmas crafts that I have finally finished - just in time. :)

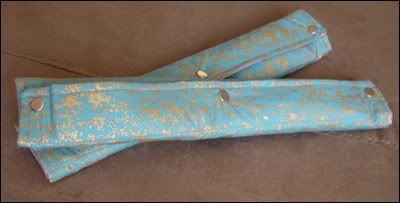
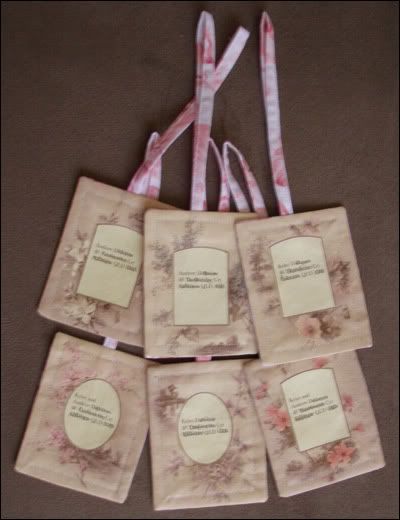
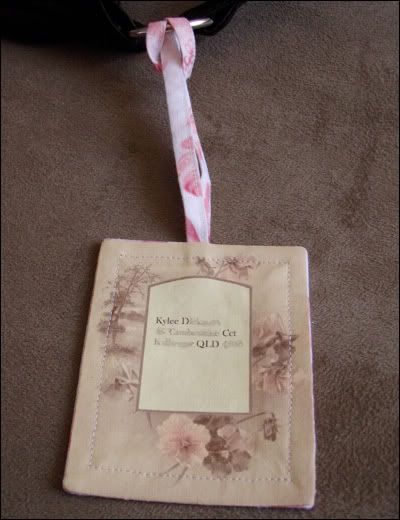
For my darling friend Kylee who came to visit I made a couple of my long seatbelt covers since she admired the idea - she too suffers from the sharp edge of the seatbelt and the short length of standard seatbelt covers. In addition I made her a collection of luggage tags since she and her husband travel a lot and own their own place now - meaning that their address shouldn't change for a good while, and they can therefore keep using these tags for the foreseeable future. I love my iron-on stuff - didn't it make adorable tags?

Kylee's seatbelt covers


Luggage tags


Luggage tag close-up


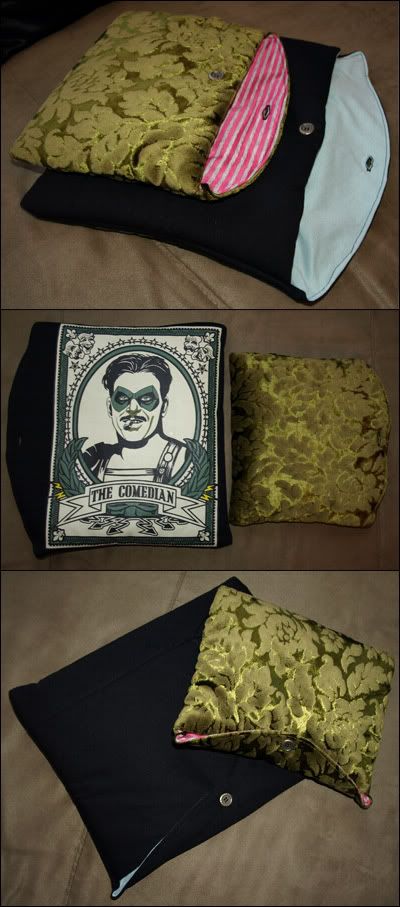
Next we have these two laptop sleeves which I made for my sister and brother. The idea came when we found the comedian tshirt for special ($5!) but they didn't have any big enough for my brother. I filled them with batting to give them some cushioning and went with a simple flat button closure instead of velcro because I could just imagine how wrecked the ole hook'n'loop would make the fabric in a short time. My sister's one is actually made of this awesome patterned velvet-type stuff that my grandparents' old lounge chairs are made of - I'm sure she'll appreciate that.

Laptop sleeves


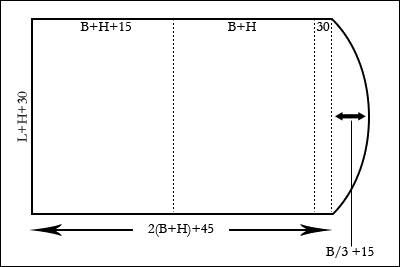
Since it was pretty simple, I made up a pic showing how I made the patterns for them. If you can't figure out my super-secret code, L, B and H stand for length, breadth and height, and all measurements are in millimetres. It has a 10mm seam allowance. Cut one of main fabric, one of lining, and cut a rectangle of batting 20mm shorter and narrower than the pattern, minus the flap. Pin the fabrics right sides together and pin the batting on top, sew and leave a hole in one side for turning. Trim the corners and the curve, then turn. Fold up, main fabric on the inside, and sew along one side with 5mm allowance, go around the flap and down the other side. Turn right-side-out, add a button and button hole and you're in business!

Laptop sleeve pattern


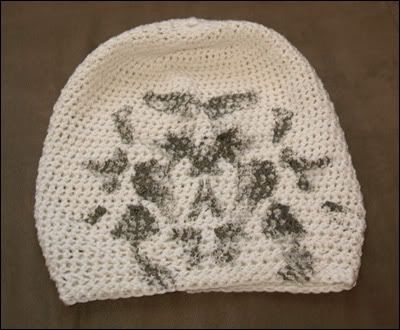
I also made this mask for my brother. It's meant to be like the one that the character Rorschach wears in The Watchmen. Can you tell he's into it? :) I would have posted a pic of me wearing it but it's far too big - my brother's head is mammoth. Anyway, it's crocheted with ivory bamboo thread, just like a long beanie, and then I made my own inkblot-type image with fabric paint and pressed the mask into it to get the pattern. Not bad for an experimental piece, I think.

Rorschach mask


For EJ's mum I made a diary cover which I like, but I'm worried she won't:

Advaita's diary cover


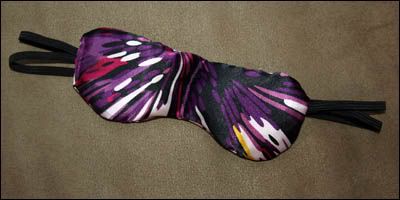
And for his sister a rice-filled eye mask:

Rice-filled eye mask


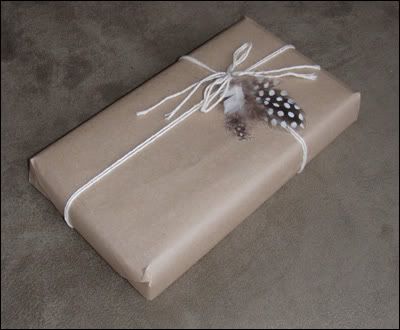
Ooh and this is how I've wrapped all the prezzies this year - I love the look and I reckon it's tres classy. Not to mention cheap!

Xmas wrapping


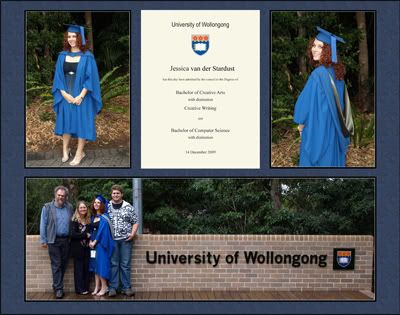
For my grandparents I put together a little composition of photos from my graduation since they couldn't come. It's cute, don't you think? Anyway, it's big and framed and now they can brag to their friends about how clever I am.


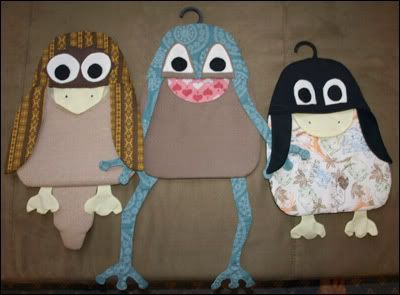
And now, my favourite item of crafty goodness this xmas - please meet the peg buddies!

Introducing the peg buddies


This little guy is for EJ's grandparents. Do the penguin walk!

Penguin peg buddy


Then we have this wise fellow for my grandma. Yes, it's an owl. I will not listen to anyone who tells me it's a platypus. It's an owl!

Owl peg buddy


And finally, this happy amphibian is for my Mum.

Frog peg buddy


Nourish them with pegs and they'll help you hang out the washing! What a fun way to use little bits of fabric and reuse those little useless hangers you get when you buy new underwear. Eco-friendly and cute, people. That's right.

Say goodbye guys! It's time to be wrapped up for the relos.

Goodbye, peg buddies


If people are interested, I may be able to put together a tutorial/downloadable pattern for the peg buddies. But really, it's just an idea that you can execute on your own, making it up as you go along - that's what I did.

Anyway, it's time for me to get going - we've found our new place and I need to get into the business of packing.

Merry xmas everyone!

~Eyespiral

P.S. Apologies for the poor image quality for this post - normally if they turn out this bad I just go and take some more photos, but since these all needed to be wrapped I can't retake them.

P.P.S. This might be the first post that I've written and posted all in one session. Amazing!