
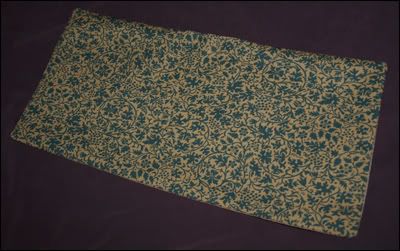
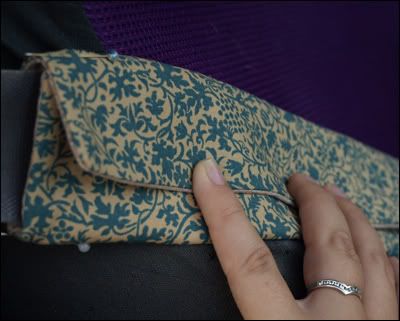
As often happens when I get an idea in my head, I've produced another pretty thing. :) Check out our new personalised seatbelt covers!
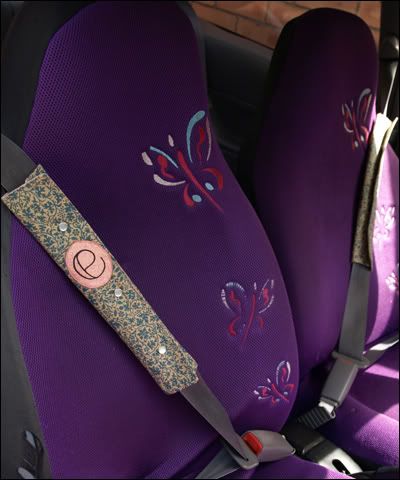
I think they're utterly adorable. And a good gift idea, too. You don't have to make then pretty and girly like mine - you could use someone's favourite football team's colours, or anything you like.
As I mentioned previously, I decided to make my own seatbelt covers because the one that I had in my car was a little too short for my liking. I got sunburnt and I was wearing a singlet top, and the end of it rubbed against the burn every time I moved. This also reminded me of how the velcro closure sometimes rubbed too. Another factor was that we only had one cover, but there's two of us, and if we were ever going out and I forgot to get EJ to give me the cover, then my pretty blouse would get ruined from rubbing against the seatbelt for as little as five minutes. Plus it was boring!
So here's a tutorial showing how to make your own long, pretty seatbelt covers.
Materials and tools
- Fabric.
You want something kinda sturdy for the inside (the part that will be against the belt) and something soft and forgiving for the outside (the part you'll see and will rub against your clothes). Avoid stretchy fabrics. I used goldish upholstery fabric for the inside and blue printed cotton for the outside. Because the cotton is flimsy, I used iron-on interfacing for that piece. - Stuffing.
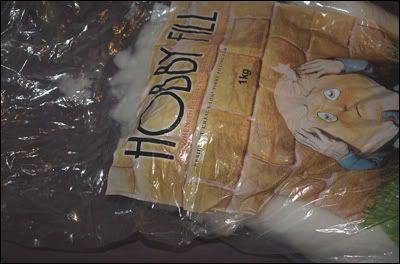
I used hobby-fill (used for stuffed animals, etc), but you could also use batting, recycle a cushion/pillow, or just use fabric scraps. - Cotton.
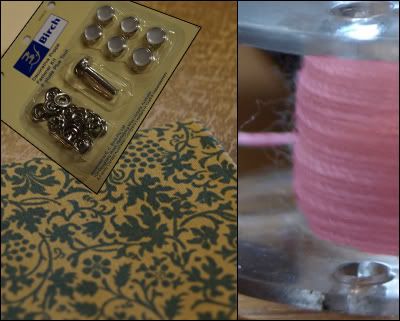
I used pink because it would match my appliques. - Snap button fasteners.
You don't have to use these, velcro would do, but I've mentioned my gripes with velcro above.
Method
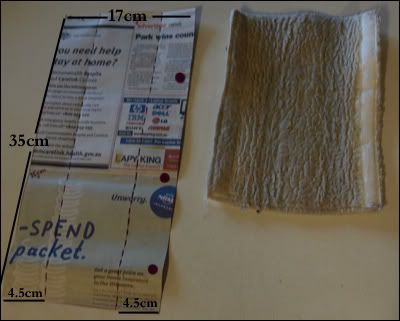
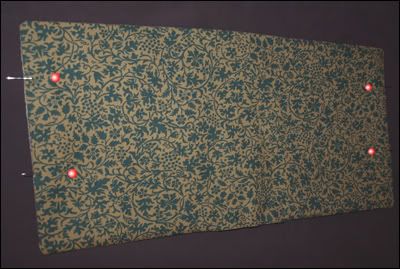
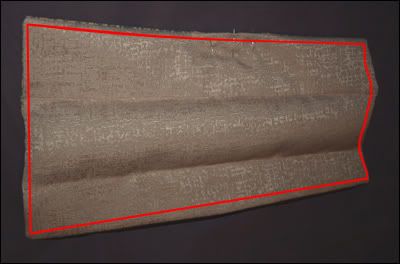
1. Make your pattern. It's so easy - just a rectangle! So I've not uploaded a pattern for you to print. I used my existing seatbelt cover as a guide, lengthening it as necessary. You can use my measurements as shown below (17x35cm). Also mark out the intervals at which you'd like your buttons. Since my little snap fastener kit had six buttons and I was making two covers, I marked three buttons down the long edge.
2. Trace your pattern onto your interfacing, if you're using it, or directly onto the back of your fabric, if not. You just need one rectangle for the inside fabric and one rectangle for the outside fabric for each cover you intend to make. Cut out your rectangles, leaving about 1cm seam allowance. Pin your two pieces right sides together, leaving a space of about 10cm on one of the long edges.
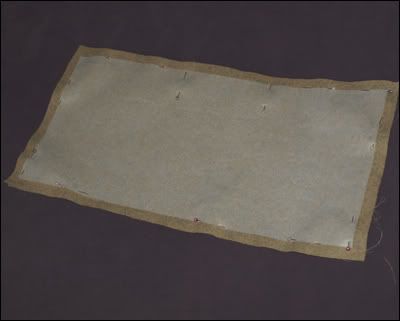
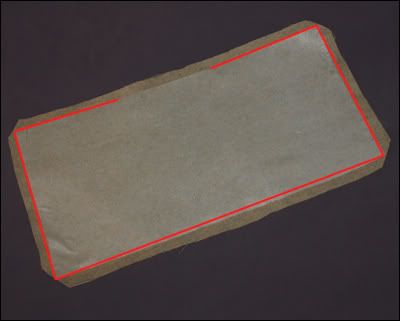
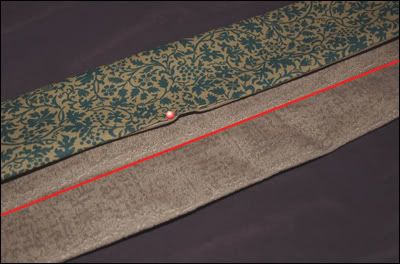
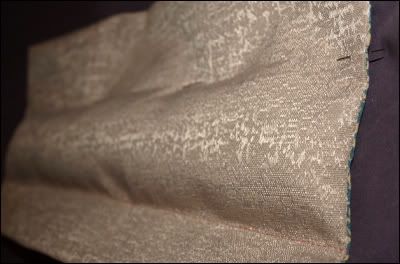
3. Sew around the perimeter with a straight stitch, backstitching at the beginning and end to make sure your seam is secure, leaving space on the long edge unsewn, as pictured below. Trim the corners at 45 degrees.
4. Fold back and iron flat your seam allowance around all the edges. This will make for crisper edges after turning.
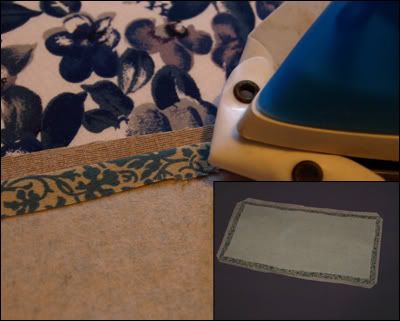
5. Turn your work right side out, using a skewer/knitting needle/crochet hook/pen/whatever to push the corners out and make them nice and sharp. Iron it flat.
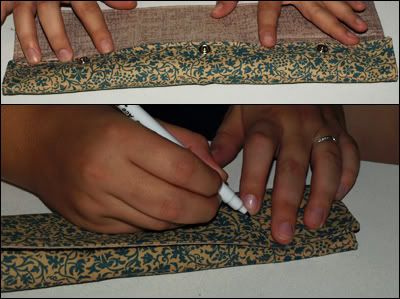
6. Head out to your car and bring a couple of pins and your cover-in-progress. Wrap your cover around the seatbelt like you want it to be when you're done, then at one end use your pins to mark at which intervals your cover will fold.
7. Fold your cover in half lengthways and add two more pins to mark the folds at the other end.
8. Pin shut the opening that you used for turning. Fold you cover according to the pins you used to mark them and iron, so that you can see where the folds are going to be.
Now it's time to sew along the first fold. This is the fold FURTHEST from the opening we pinned shut. Make sure you sew the one that's furthest from the opening, otherwise you won't be able to stuff it.
9. Grab your stuffing, whatever it may be, and fill the centre section of your seatbelt cover. Do not overstuff it - this is just to create a little bit of cushioning between you and the belt. Add a little bit of stuffing at one end of the middle section, then pin along the second crease at that end, then stuff the other end, pin the crease at that end, then stuff the middle and pin the middle of the crease closed, too. It should look like the second image below.
10. Now sew a straight stitch along the second crease, closing off the stuffing. Finally, run a straight topstitch around the entire perimeter, closing the opening we used for turning and stuffing.
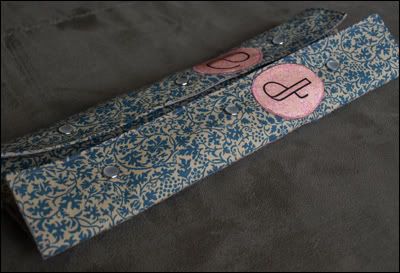
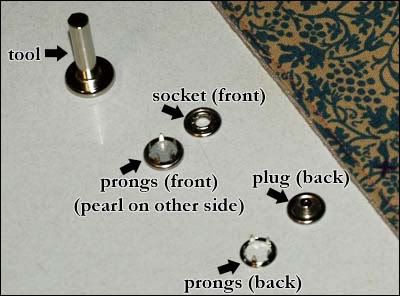
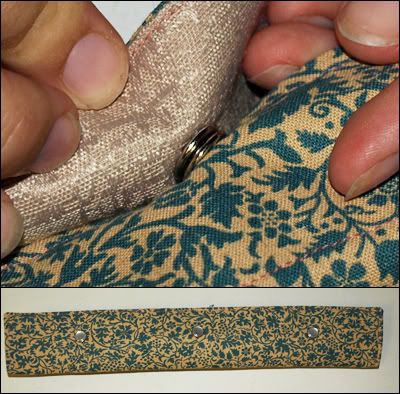
11. It's time to attach the snap fasteners. The kit that I'm using cost about $4, but the ones without the pretty mother-of-pearl covers were even cheaper. It came with six buttons, a single set of which you can see pictured below.
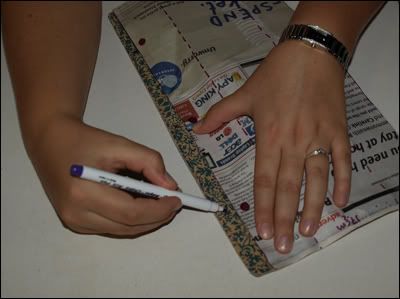
12. First you need to mark where you're going to place the backs of your buttons - the un-pretty side of the snap fasteners. Fold up your seatbelt covers and think about where you want them to be, then get your pattern and use the marks you made on it to mark the position of the buttons with a fabric pen. Notice that I'm marking this on the good side of the flap that I intend to be on the inside of the finished cover.
13. Next, take the prongs for the back part of your button and position it underneath one of your marks so that the prongs push up around the mark you made.
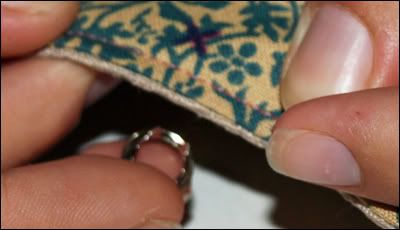
Use the narrow end of the tool that came with the kit to push down your fabric so that all the prongs pierce the fabric.
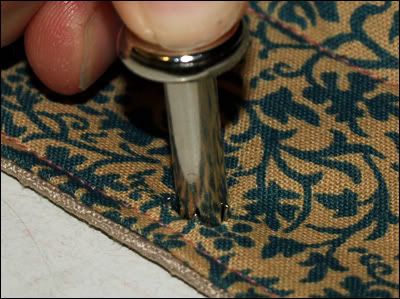
14. Once all the prongs are through your fabric, place the plug piece of the button on top. There's a little groove in the back where the prongs sit. Then position the wider end of the tool from the kit on top...
...and hammer it on in. If you don't want to ruin your table, I'd suggest putting a craft mat or some cardboard underneath before you hammer. Repeat for the rest of your button backs.
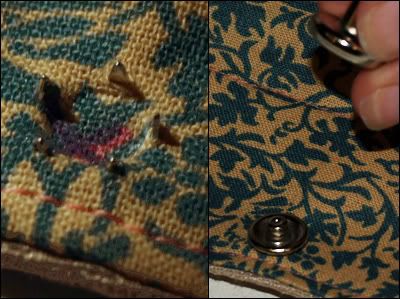
15. Now fold both flaps in so that the front flap is over the back one, covering up the buttons you just hammered in. Get your fabric marker and feel around until you find the nubs of each of the buttons, and mark them out. This will be the position of the top of your buttons.
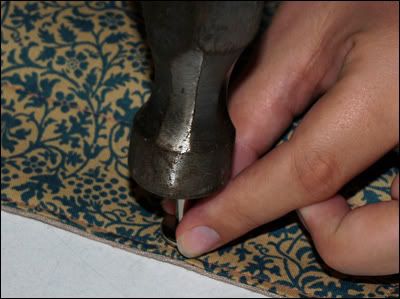
16. Repeat the same process as you did for the button backs, except this time make sure you push the prongs through from the opposite side, so that the pretty part faces outwards (that means that the prongs go through from the side with the blue printed fabric and stick out from the golf fabric, in my case). It's easier to do than to explain. And there you have it, nice secure snap fasteners for your seatbelt covers.
17. Add any embellishments you wish, and you're done! Congratulations, you are the proud owner of a luxuriously long personalised seatbelt cover that will protect your sensitive skin and pretty clothes from wear and tear.
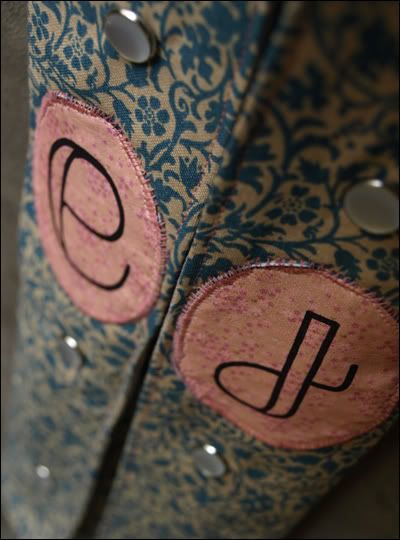
In case anyone is wondering about my His & Hers medallions (E for EJ and J for Jessica), I photoshopped up the images and printed it on some iron-on transfer paper that I bought on special from Aldi. When I began I thought that the medallions would hang off the edge of the front flap, and so I sewed them to ovals of my blue printed fabric (right sides together), snipped the blue fabric and turned it right side out, then appliqued the medallions to the flaps. Had I realised that I had enough space, I would have ironed them directly onto the flaps and saved myself all that trouble. Not to worry, I still love 'em.
Until next time,
~Jessica


Those look wonderful!
ReplyDeleteI am going to make some - for me, and for a gift1! Thanks so much for a great tute!
ReplyDeleteYay! Thanks! I am about to head on a long car trip with my kids and we needed new ones!
ReplyDelete