
The first piece of news that I'd like to share is that I've added a new gadget on the righthand side of my page - Followers. That's right! If you want to keep up-to-date with what I'm posting, just click the link to follow this blog. If you're using Google reader then my posts will appear in there, or if you are using another RSS reader you can click the 'Subscribe to' link further down the righthand column of the blog.
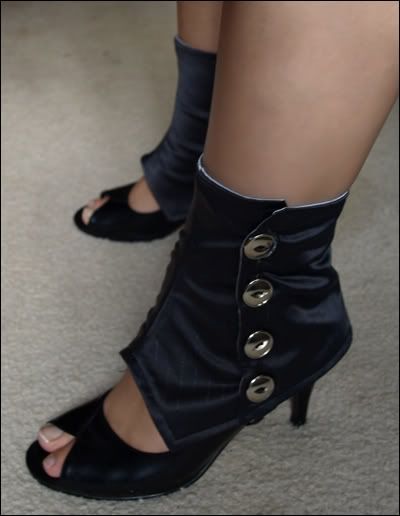
Now to business - yet another two items I can cross off my two steps forward one step back future projects list. Behold my she-tails and matching spats!


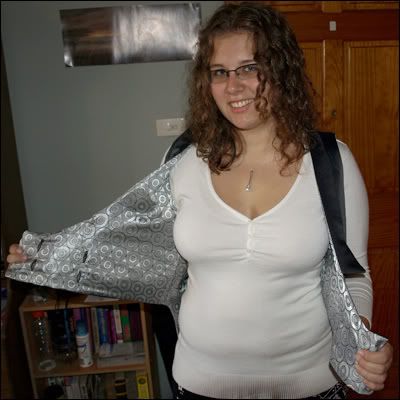
I am so proud. I think everyone should dress like this all the time. :)
To make this I used a pattern I made from tracing an old waistcoat EJ got from an op-shop. I did this a while ago to make him a red waistcoart to match my formal dress for his work's annual awards night:
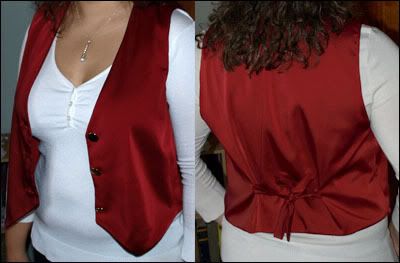
Not bad for an afternoon's work, eh? Anyway, I altered that pattern to have a scoop, be double-breasted and have the tails at the back, plus added some lapels for good measure. I love the materials that I used - the pinstripe suiting is lovely, and the silver lining was just a scrap in the offcuts bin that I could not resist.
As to the spats, I downloaded the pattern from Thank you for not being perky. I love them, too, and I think I'll be wearing them even more often than the she-tails just because they're easier to get away with. And tres trendy. And cozy, too, which would be great if we had, you know, winter.
Now that the beginning of Autumn semester at UOW is drawing nigh, I probably won't have as many posts. However, I am determined not to let this blog fade into the background and I will keep updating and checking for any responses people might post. While real schoolwork might be the enemy of the blogging world, I have no doubt that procrastination will come to its aid. :)
I've also begun tutoring again now that the high school kids have gone back to work. If you're interested, I tutor Mathematics for years 7-10 (and revision for adults) and English for years 7-8 in the greater Wollongong area, and you can get hold of me via Sharron at Illawarra Home Tuition on 02 4261 3000 - just mention you are interested in working with Jessica.
I also wanted to post a couple of other older projects that I never got around to photographing and posting: my lounge cushion covers, which I love lots and lots, and my matching reupholstered stools:
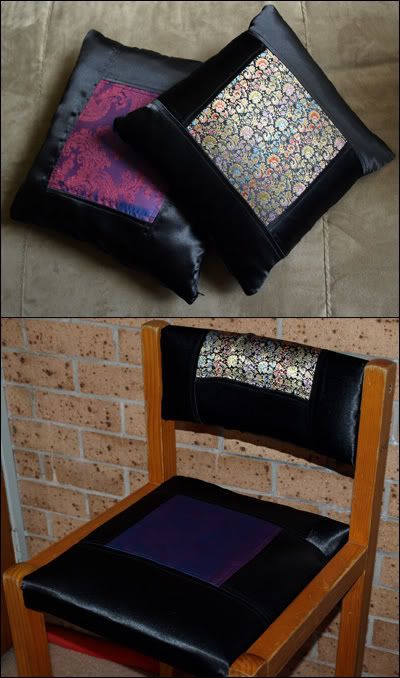
I made these a long time ago now, back when we first got the new lounge. There's about 14 cushions, and they have the brocade on one side, the paisley on the other. And more recently, I made covers for both the computer monitor/keyboard and printer:
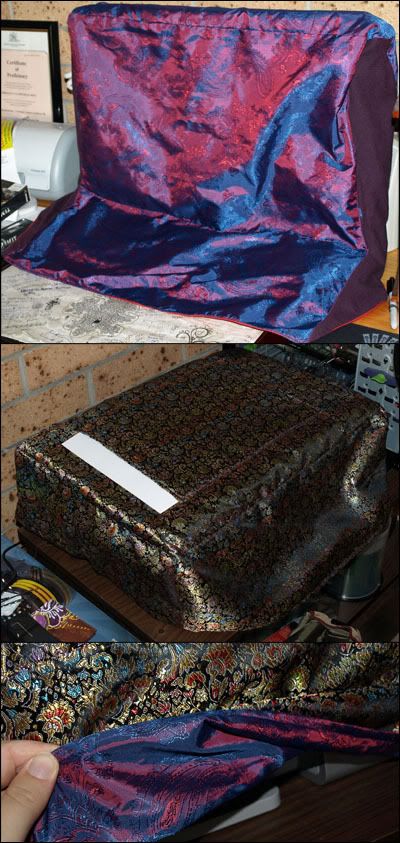
I especially liked making them reversible and adding the pouch for the printer paper. :)
If anyone is interested, I'd be happy to accept any tutorial requests that people might have. I can't guarantee that they'll be strictly professional, but I can assure you that I will do my best!
Anyway, I think that'll do for today (this post has been a long time in the making, actually), so I'll say goodbye.
~Jessica


could you give a tutorial for the coattails? I'm not an experienced seamstress and I doubt I could pull off just winging it...
ReplyDeleteI will be able to put together a tutorial for the tails in the future (like end of November, start of December). I'm just busy with uni until then. But here's a general guide until then, if you'd like to try to wing it :)
ReplyDelete1. Find a simple vest/waistcoat that fits. This can be from the op-shop/thrift store, from a friend's or parent's wardrobe, whatever - you're not going to ruin it.
2. It'll be made of 3 primary parts: back, left front and right front. Get some newspaper or patternmaking paper and lay it out on a large surface and make sure that it's long enough to fit both the height of the vest currently and the extra height the tails will require.
3. First fold the vest in half so that you can find the centre of the back piece. Lay this on your paper close to the edge and trace around it, marking where the shoulder and side seams are and joining those lines up with a ruler after you remove the vest. Also mark the centre back line 'fold', so you don't forget to lay it on a fold when you cut it out - I've made this mistake before!
4. Follow this process again to get a pattern of one of the side front pieces. Mark where the buttons go if you would like them to be the same on your tails.
5. Now it's time to freehand. Put on the vest and take a look in the mirror. How far down do you want the tails to reach? Measure that distance from the bottom of the vest and then rule down that distance from the bottom of the centre back line on your pattern. If you want tails like the ones I made, make a V shape from line of the side seam and down to that length, then back up to meet the normal centre back - you'll have a wide split at the back. If you want a more traditional set of tails, draw a curve from the side seam line down to where you added the extra elngth from the centre back - it'll make a kind of ladybug shape. If you do this, remember to cut a split up the the level of the centre back.
6. If you want tyours to be double-breasted like mine, once again adjust the pattern, but this time for the side front. I dropped the curve down low and extended it about 10 or 15cm further accross so that it'd have a good overlap.
7. If you want to add lapels - and here be advised that my lapels are pretty shocking - all I did was to trace the neckline of the side front and the back and just draw the shape I wanted the lapel to be. It's not professional and looks terrible if you look up close, so I don't think this is a great method; I just don't know how to do it otherwise
8. Once you've finished adjusting your pieces, add seam allowance to all of them. I use 1.5cm.
ReplyDelete9. From both your main and lining fabrics, cut: one back piece (laying the centre back line on a fold as previously discussed), two opposing side fronts, and lapels as appropriate to your pattern.
10. Sew all your main fabric pieces together except at the top of the shoulders.
11. Sew all your lining fabric pieces together except for the tops of the shoulders, and also leave a nice backstitched-on-either-side gap in one side seam - we'll use this for turning.
12. Lay your main and lining pieces right side to right side and pin all round the edges and sew everything - except the tops of the shoulders.
13. Trip your seam allowances if necessary (it will definitely be necessary around the split between the tails and on all the corners), then turn it right way out through the open side seam. Use a knitting needle or something similar to push our all seams around the edue to be nice and neat, then press. While you're pressing, fold the raw edgest of the tops of the shoulders under and press. Also fold under the raw edges of the side seam in preparation to stitching it closed.
14. Insers the front top should inside the back top should and pin it in place. Then either carefully hand stitch or manically machine stitch (I'm a fan of the latter) across the overlapped seam, trapping all the raw edges out of sight.
15. Hand stitch the side seam closed. Add buttons and button holes and appropriate, then make a pair of spats to match and go out to strut your stuff!