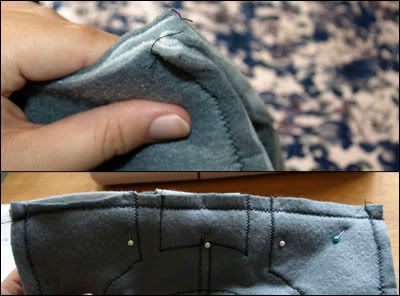
Wednesday, December 23, 2009

Xmas crafts! Seatbelt covers, sewn luggage tags, laptop sleeves, crochet Rorschach mask, diary cover, eye mask and peg buddies.

Hello world!

Here's a quick post of the xmas crafts that I have finally finished - just in time. :)

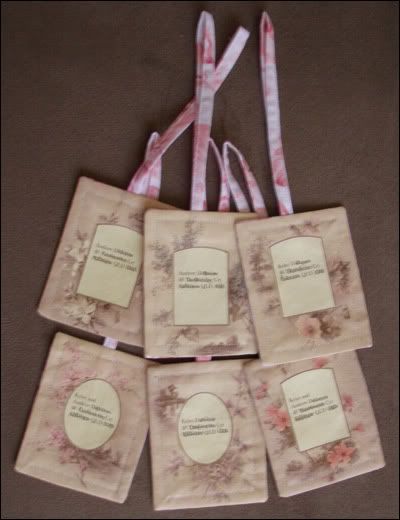
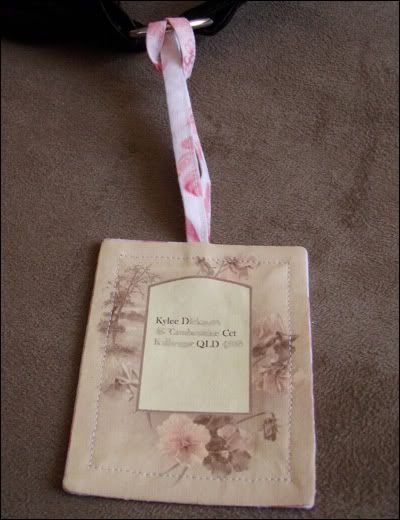
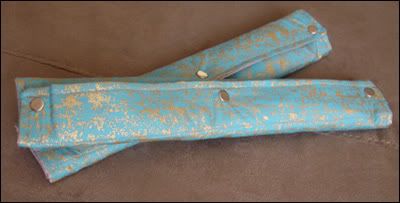
For my darling friend Kylee who came to visit I made a couple of my long seatbelt covers since she admired the idea - she too suffers from the sharp edge of the seatbelt and the short length of standard seatbelt covers. In addition I made her a collection of luggage tags since she and her husband travel a lot and own their own place now - meaning that their address shouldn't change for a good while, and they can therefore keep using these tags for the foreseeable future. I love my iron-on stuff - didn't it make adorable tags?

Kylee's seatbelt covers


Luggage tags


Luggage tag close-up


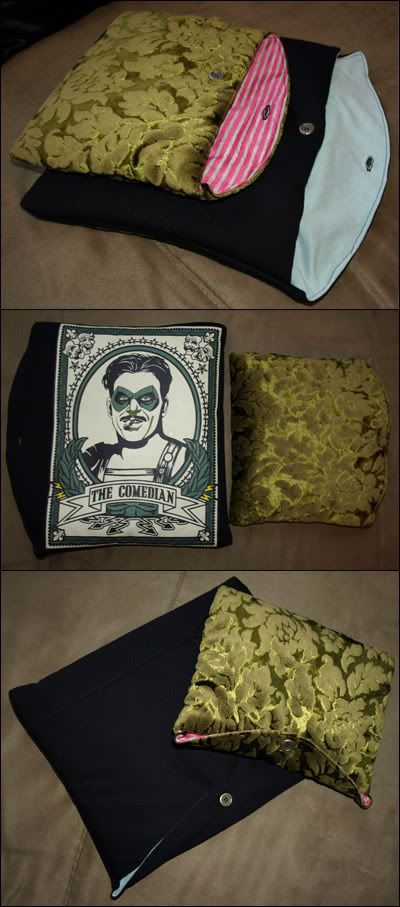
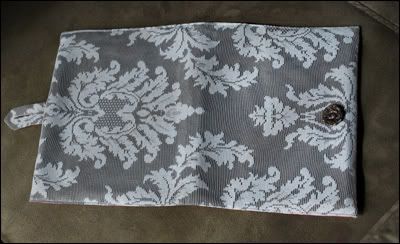
Next we have these two laptop sleeves which I made for my sister and brother. The idea came when we found the comedian tshirt for special ($5!) but they didn't have any big enough for my brother. I filled them with batting to give them some cushioning and went with a simple flat button closure instead of velcro because I could just imagine how wrecked the ole hook'n'loop would make the fabric in a short time. My sister's one is actually made of this awesome patterned velvet-type stuff that my grandparents' old lounge chairs are made of - I'm sure she'll appreciate that.

Laptop sleeves


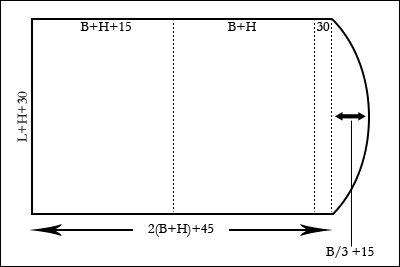
Since it was pretty simple, I made up a pic showing how I made the patterns for them. If you can't figure out my super-secret code, L, B and H stand for length, breadth and height, and all measurements are in millimetres. It has a 10mm seam allowance. Cut one of main fabric, one of lining, and cut a rectangle of batting 20mm shorter and narrower than the pattern, minus the flap. Pin the fabrics right sides together and pin the batting on top, sew and leave a hole in one side for turning. Trim the corners and the curve, then turn. Fold up, main fabric on the inside, and sew along one side with 5mm allowance, go around the flap and down the other side. Turn right-side-out, add a button and button hole and you're in business!

Laptop sleeve pattern


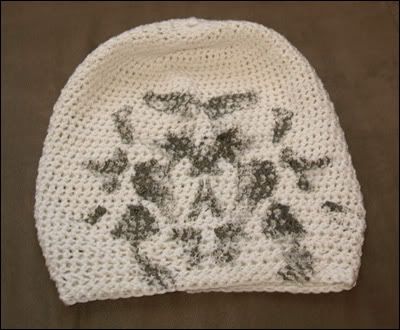
I also made this mask for my brother. It's meant to be like the one that the character Rorschach wears in The Watchmen. Can you tell he's into it? :) I would have posted a pic of me wearing it but it's far too big - my brother's head is mammoth. Anyway, it's crocheted with ivory bamboo thread, just like a long beanie, and then I made my own inkblot-type image with fabric paint and pressed the mask into it to get the pattern. Not bad for an experimental piece, I think.

Rorschach mask


For EJ's mum I made a diary cover which I like, but I'm worried she won't:

Advaita's diary cover


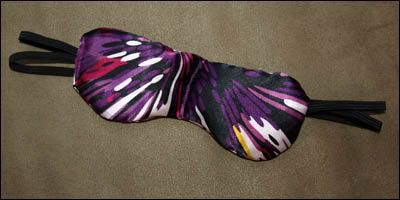
And for his sister a rice-filled eye mask:

Rice-filled eye mask


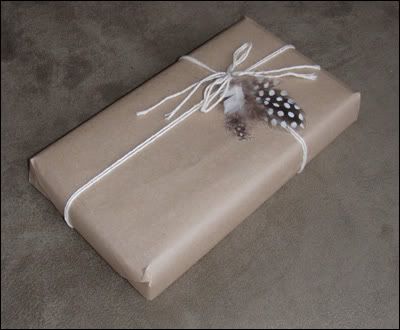
Ooh and this is how I've wrapped all the prezzies this year - I love the look and I reckon it's tres classy. Not to mention cheap!

Xmas wrapping


For my grandparents I put together a little composition of photos from my graduation since they couldn't come. It's cute, don't you think? Anyway, it's big and framed and now they can brag to their friends about how clever I am.


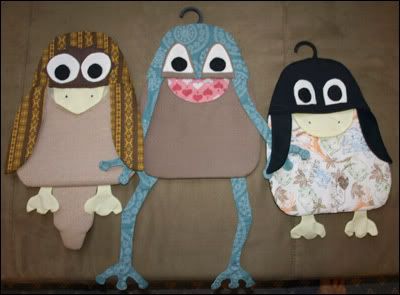
And now, my favourite item of crafty goodness this xmas - please meet the peg buddies!

Introducing the peg buddies


This little guy is for EJ's grandparents. Do the penguin walk!

Penguin peg buddy


Then we have this wise fellow for my grandma. Yes, it's an owl. I will not listen to anyone who tells me it's a platypus. It's an owl!

Owl peg buddy


And finally, this happy amphibian is for my Mum.

Frog peg buddy


Nourish them with pegs and they'll help you hang out the washing! What a fun way to use little bits of fabric and reuse those little useless hangers you get when you buy new underwear. Eco-friendly and cute, people. That's right.

Say goodbye guys! It's time to be wrapped up for the relos.

Goodbye, peg buddies


If people are interested, I may be able to put together a tutorial/downloadable pattern for the peg buddies. But really, it's just an idea that you can execute on your own, making it up as you go along - that's what I did.

Anyway, it's time for me to get going - we've found our new place and I need to get into the business of packing.

Merry xmas everyone!

~Eyespiral

P.S. Apologies for the poor image quality for this post - normally if they turn out this bad I just go and take some more photos, but since these all needed to be wrapped I can't retake them.

P.P.S. This might be the first post that I've written and posted all in one session. Amazing!

Tuesday, October 20, 2009

Fishtail skirt, summer dress, sewn greeting cards, another diary cover and four varieties of Hunt the Wumpus!

Hello world,

Well! It's been a long semester, and therefore a long time since I dedicated some time to a blog post. It is time for this to change! I have lots of things to show, and plans for more on the way. :)

What to do first? My own chatty news or some piccies of creations that occurred in the last... six months? I think creations. Maybe interspersed with my normal chatter.

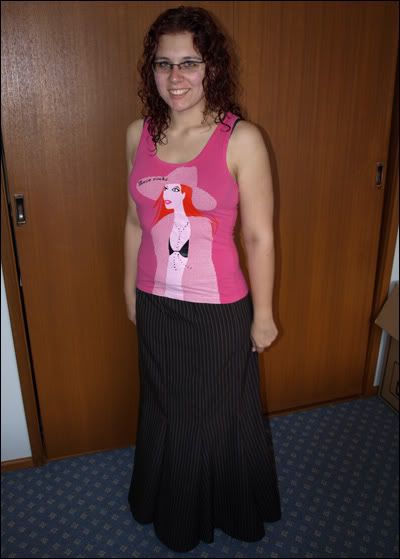
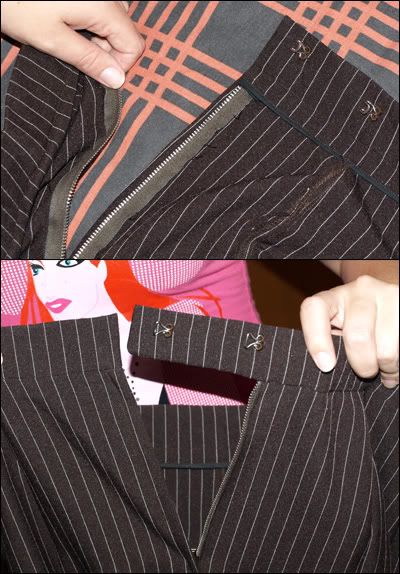
First of all we have this extra-groovy fishtail skirt. I followed this tutorial, minus the extra frill, and I think it turned out splendidly. Don't you? This is probably the most professional piece of clothing I have ever made. EJ's mum gave me a book voucher for my birthday back in July and I got this great big book of sewing, which has all sorts of nifty advice in it. (I must admit, much of the stuff I took on board and used in this skirt were things that my Mum had taught me at one time or another, but that I gave up doing pretty quickly because I am one impatient puppy.) Things like tacking seams together before actually sewing them with the machine so as to prevent any accidental slips, and tacking the zip in place in order to get it done just right (so, so much tacking - I guess I just never wanted to waste all that thread), and nice ways to neaten up the raw edges (I used bias binding for this), and how to install a proper interfaced waistband. Speaking of such, I was very cranky when I went to my local Spotlight and asked after waistband interfacing and received the response, "[derisive snort] Never heard of it." No offer to ask someone else, no offer to check on the computer, not even an apologetic smile. I know not everyone knows everything, but if the big Spotlight brand is going to push all the small businesses out of town, the least they could do is train their employees properly! Anyway, after that I went for a wander about the notions section and stumbled across the exact same waistband interfacing, brand and all, as the one described in the book. So good for me and my skirt, bad for Spotlight's street cred.

Brown pinstripe fishtail skirt


That picture doesn't really do the skirt justice, now that I look at it. Anyway, here's a close-up for the waistband and ultra-pro zipper:

Fishtail skirt - Waistband and zipper closeup


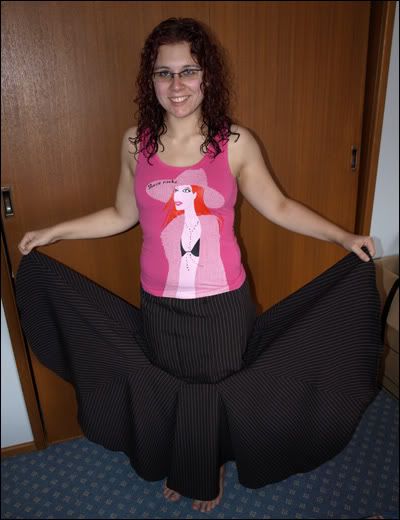
...and a pic to show you how awesome the tail is (and how much dern material I needed to make this lovely garment).

Fishtail skirt - tail spread out


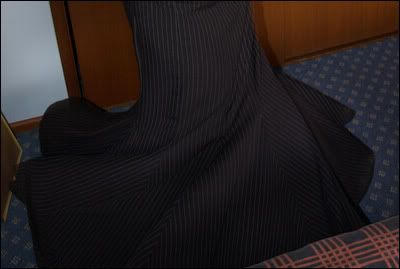
It's lots of fun to spin around in circles in - looks read pretty!

Fishtail skirt - spinning around


All right! I've also made this beautiful dress for a bargain sum of $15, also thanks for EJ's Mum. She also gave me a Spotlight voucher, where I got the pattern on special and the fabirc at just $4/metre! The second-most professional piece of clothing I've ever made (because I made it right before the fishtail skirt). The only problem is that I've lost weight since I made both these, so they're starting to look a bit funny on.

Sun dress


That's right, astute readers - I have had great success in my Weight Watchers efforts this year. I am now a (I cannot believe it still) size 10! Not only that, I am in my healthy weight range for the second time in my adult life! Unfortunately, the notion of being fat is still so completely ingrained in me that I doubt that I will ever feel slim. Not to worry though - being able to fit into smaller clothes goes a long way to helping me blot those feelings out. The only problem is that since we moved into the new house, I have not kept up my measly exercise routine, nor have I managed to keep to my points regime. For the present I am skating along on my adjusted metabolism, but if I don't start being frugal in my eating choices soon, I've no doubt that I'll start piling the old weight back on. So I guess I should make a commitment by the time I finish writing this blog post. The commitment is: I will return to Weight Watchers and exercise, effectively getting rid of my wobbly bits that keep my overweight mindset, as soon as I come home from my trip to Queensland this month.

Speaking of all this made me think - should I post WeightWatchers-friendly recipes on here? I made a poll, which you can find on the sidebar. Please help me decide!


Next on my list of things to share are this little sewn greeting cards. I always enjoy reading the funny greeting cards that you find at the shop, but I also never like to buy them if I can help it. As long as I can remember at my house we always tended to make greeting cards (except for my Dad, who delights in finding cards at a bargan price of a dollar or less), not just because it's a bit of fun, but because you know you're giving something unique. So considering this, it was only a matter of time before I combined sewing and handmade greeting cards. In fact, I think the main reason I did it (aside from having left getting cards for some people's birthdays until right before I was meant to walk out the door) was because I was completely out of double-sided tape and pretty paper. Solution? Use all those pretty scraps from ties you've massacred in the making of a tie dress which you still have yet to complete. Grab a piece of card, fold it in half, cut the scraps to any shape or size you want, then sew sew sew. Et voila!
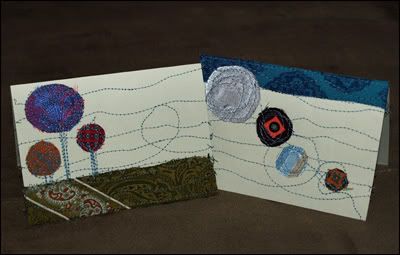
Sewn greeting cards


Too bad the camera's flash blew out the colours on some of the pretty tie fabric. I definitely am going to make myself a light box for taking photos of smaller creations such as these. Yet another item to add to the future projects list.


Next is this diary cover which I made for my darling friend Kylee's birthday. It's made the same way as the previous covers, but I like to share. :)

Fabric diary cover - False eyes


The image is one that I made myself, and the sources I used can be found by clicking on the image below to be taken to the original posting on deviantArt. It's called False eyes.

False eyes


The big news for pretty much... no one but me, I guess, is that I have four varieties of Hunt the Wumpus available for download! Hunt the Wumpus is an old computer game, originally text-based when it came out in the 70s. During my last programming subject at uni - CSCI337 The organisation of programming languages - we had four assignments in which we were to develop Hunt the Wumpus using a different programming language and programming paradigm each time. My four varieties are as follows:

  • Hunt the Wumpus - Lisp (Functional paradigm)
    This is basically the original game as from its creator (Gregory Yob), but programmed in Lisp rather than BASIC.

  • Hunt the Wumpus (evoke) - Fortran (Imperative paradigm)
    This follows the same narrative of the original game and the same rules/events/hazards, etc, but I rewrote the story to be a bit more evocative. Programmed in the dinosaur language Fortran77.

  • Wumpus Noir - Literate C++ (Literate paradigm)
    Here is where I start to make it a bit more fun! The Wumpus is now a mafia boss, and you are a detective on his tail. It was great, though my darling Karina pointed out after I'd finished that I'd consistently spelt labyrinth incorrectly the whole way though - 'labarynth'. Not to worry. Anyway, this one is using C++ and the literate programming paradigm, one that is very smart and really ought to be used all the time, in my opinion! It forces you to document your code, something which future programmers will thank you for.

  • Wumpus Intergalactica - Prolog (Logical paradigm)
    Finally, we have the sci-fi variation. You are a bounty hunter off to neutralise the Wormhole Union of Marauders, Pirates and Unsavoury Scoundrels, aka the WUMPUS. Written in the very frustrating logic language Prolog. While nowhere near the insanity of Lisp, this language is tricky to get used to, and should be left for AI and not games.


I am going to upload these games with instructions on how to load and run them on a Linux system since that's what I used to code them, but I am not going to do that now lest I never post another blog entry this year. So I will update this post with the appropriate links once I have completed that arduous task.

***Edit: You can now download and find the instructions for all my Hunt the Wumpuses in their dedicated post, which you can find here.***


Finally, I'd like to end this with an interesting site that I discovered during my astronomy class this semester (which was tres awesome, by the way). www.nasaimages.org not only saved my bacon while putting together my final assignment, it has a wealth of beautiful space images that anyone can access, like the gorgeous infrared image of the Helix Nebula below (FYI, the Helix Nebula is a planetary nebula, which is misleadingly named because it resembles a gas giant like Jupiter when viewed through a week telescope - in fact, it's the carcass of a star similar to the Sun). Of course you should always be sure to follow copyright laws, but no-one is stopping you from grabbing one of these hi-res babies and using it as a stellar desktop background. Click on the images to be taken to the original article and image.


And that is all for me today. But coming soon you can expect a look at the various items I'm making for xmas presents this year, as well as a tutorial to make the lady-tails from a while ago. And of course, a post detailing the excitement of quadralingual Hunt the Wumpus!

~Jessica
Saturday, June 6, 2009

End of Semester - crochet bonnets, crochet easter baskets, sewn diary covers, crochet jumper and beret

Hello world,

Well, the semester has been arduous and the exams are still yet to come, but I felt like it was time that I made another post here, just so y'all don't think I've fallen off the planet.

I did find the time to work on a few little projects over the last few months, so here they are:

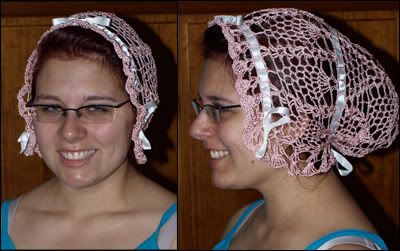
First, our new neighbours had a baby girl. I decided it'd be darling to crochet her some booties and a bonnet. Unfortunately, I forgot the take a photo before I gave her the booties. The bonnet, however, came out a lot larger than I intended - here's the one I made from the same thread as the booties:

Pink crochet non-baby bonnet


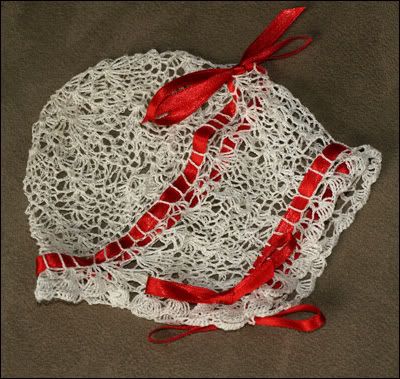
As you can see, it worked out just a tad too large for a newborn. So I decided I'd get out great-grandma Stinson's old thread crochet gear and try again. Here's the much smaller and more adorable and lacy result:

White thread crochet baby bonnet


Isn't it adorable? I love it to bits. Of course, when I get some nice soft white silk ribbon I'll replace the stiff red satin stuff.

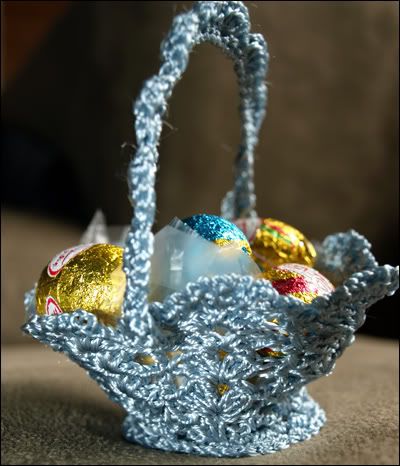
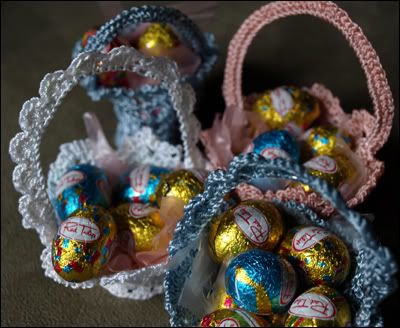
I also got my craftybones out for Easter time. I crocheted a collection of Easter baskets for my family with which they were delighted:

Blue crochet Easter basket - side view

Crochet Easter baskets


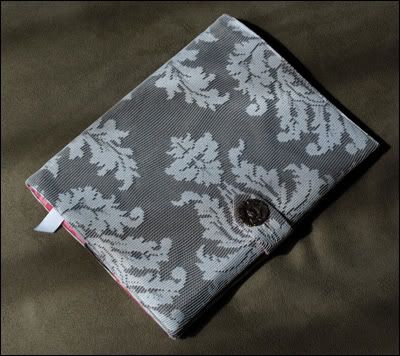
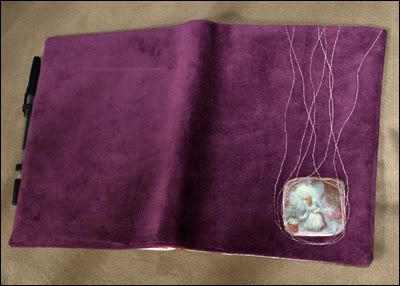
I have also made a couple of diary covers. As I mentioned a while ago, I found the cutoffs basket in the upholstery section of my local spotlight, where you can get copious amounts of pretty, sturdy fabric for very cheap - copious amounts if you're making little items such as diary covers, that is! First we have this deliciously lacy number:

Lace diary - front

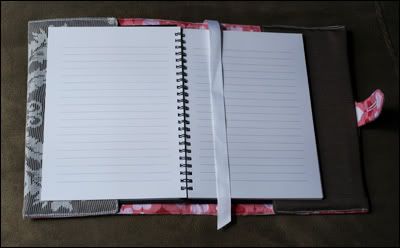
Lace diary - open, cover

Lace diary - open, inside


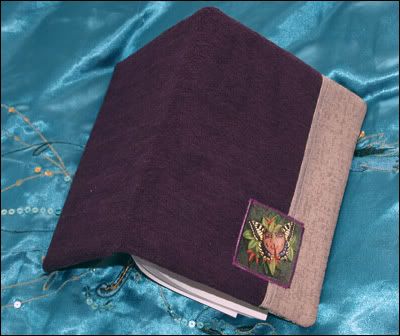
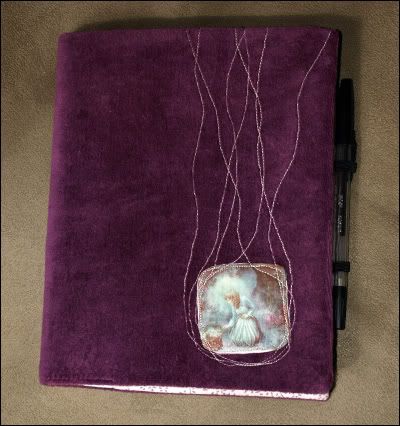
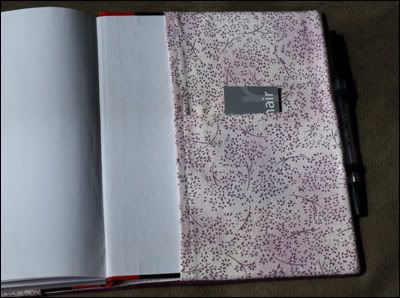
And this adorable and snug-fitting purple one, too. It has pockets in the inside of the front and back covers for keeping track of loose notes and the like, and elastic on the edge to hold your pen.

Purple diary - front

Purple diary = open, cover

Purple diary - inside back cover pocket


My etsy store has become empty because my listings have expired, but as anyone who's looked at my side banner in the past may have noted, I only had the one item for sale - Fervourography, my compilation of prose and poetry. I will be relisting this, but in addition I'd really like to make a collection of these diary covers and list them as well. And I'm planning on making more bookmarks, too. Then I will have a whole THREE types of items in store, can you imagine? :)

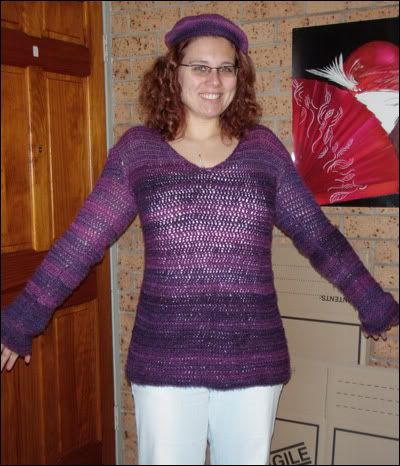
The most recent project I've got to show you is twofold - a crochet jumper and matching beret:

Purple crochet jumper and beret


I'm really happy with this because it's so cozy - mohair and silk blend - and I made it without the help of a pattern.

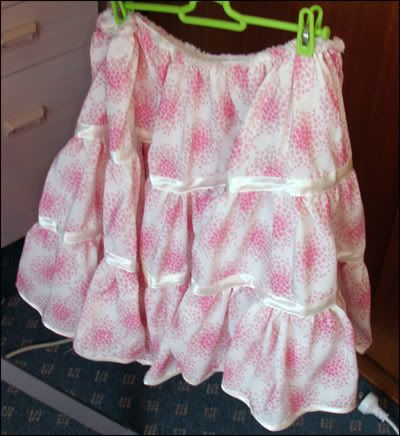
I started writing this post aaages ago but I put off publishing it because I thought I'd quickly take a picture of the other project I was working on - an adorable petticoat-style skirt. It's almost finished, I've just got to get a little more of the satin bias tape to cover the waistband. Here's a piccie anyway, just because it was the cause of my delay:

Petticoat-style skirt WIP


In news from my life, aside from exams coming up the big news is that we've been told we have to move out of our unit. The property was sold and the new owner wants to move in. What? You don't think that moving house creates the greatest study environment? Pah!

Fortunately we've found a new place to rent about ten minutes from here. It has 3 bedrooms instead of 2 and a lock up garage instead of a car space, so it's a move up. Too bad the price difference shows it! Oh well. I'm really looking forward to having enough space to set up my dining table and chairs that until now have been in storage at my parents' place. I'll be able to hold a dinner party! Or, thinking more mundanely, I'll be able to eat my dinner at a table rather than in front of the tv! And the extra bedroom means that we can have both a craft room and a study, and since all three rooms have built-in wardrobes I'll have somewhere to put all my stuff. It's almost disappointing to recall that we'll only be there for half a year before moving wherever I get a job in 2010. But let's not think that way, but instead rejoice in the extra space I'll we'll have!

Tuesday, March 3, 2009

Customised t-shirts, fabric bookmarks, new pencil case and fabric storage cubes

Hello world,

The final week before uni came back spurred me to make a bunch of things!

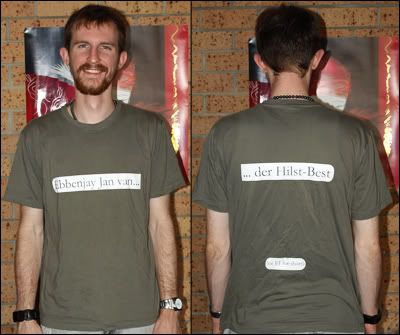
First of all, we have these lovely tshirts I did for EJ:

Ebbenjay... tshirt


This is EJ's real name. It's too long for one side of his shirt. :) The little bit down the bottom at the back says, "(or EJ for short)".

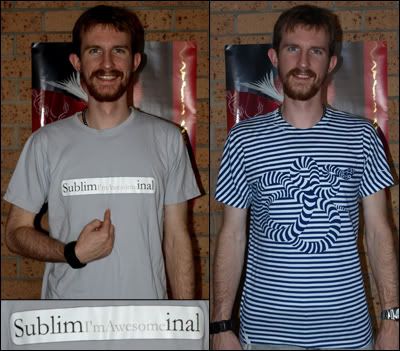
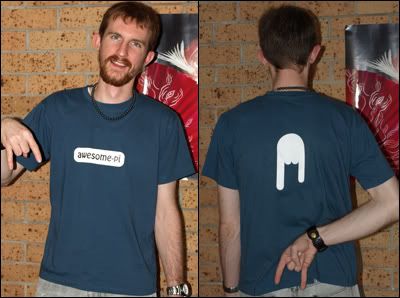
Awesome-pi shirt


Awesome-pi (you know, as in the mathematical symbol) is just something we say. It's funny because of its perfect nerdiness. I have a black shirt the same as this one, in fact I am wearing it right now.

351


For these two I have to thank Threadless. The subliminal slogan I saw on one of their shirts and while I would have liked to buy it, I couldn't justify the expense, so I made my own. The other one EJ did buy, I didn't make it, but he wanted to show it off, so here it is! You can find it for sale here.

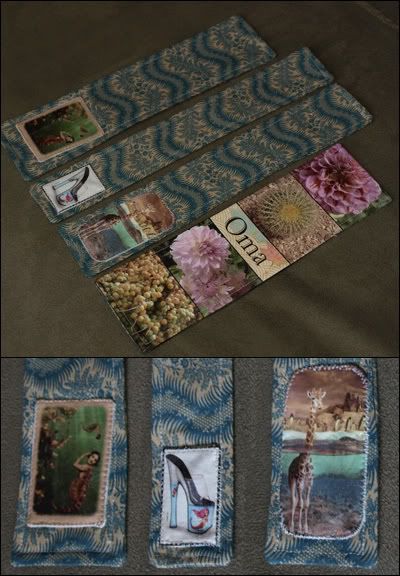
In other news, I decided to make EJ's grandmother (Oma; they're Dutch) a bookmark to give her when we went to visit for her birthday. While I was at it I made a few more because they were so quick and easy!

Fabric bookmarks


The first one is featuring my work called 'The Sea Ladies', which is posted over at deviantArt. I've also made a couple using my work 'Bewrecked'.

The sea ladies Bewrecked


Oma's one is using photographs EJ took on a visit to the botanic gardens. The other two use images that I love and found on dA. You can find the originals here and here.

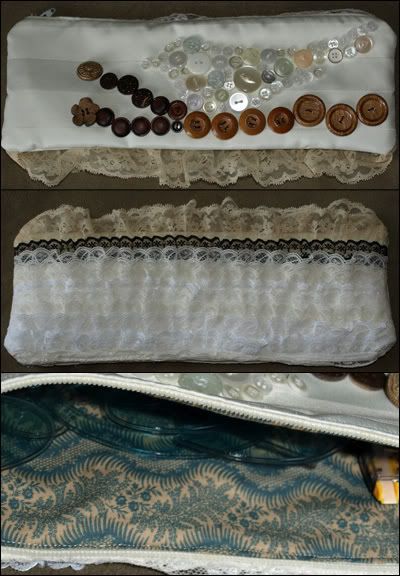
I recently discovered that my pencil case that I made for last year has mysteriously disappeared to another universe. I'm crushed, as you might imagine, however in order to help myself move on from this tragedy, I made a new one! This one is big because I wanted to fit my french curves rulers inside. Do you like it?


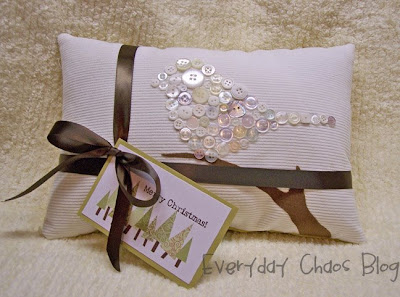
I got the idea for the birdie one from the birdie cushion below that Everyday Chaos made.

Everyday Chaos' birdie cushion


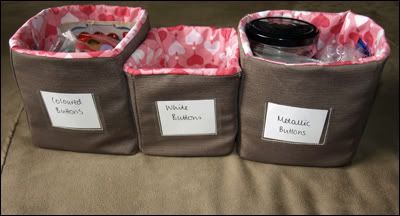
Finally, I actually made something from my future projects list! Amazing, I know. Crazy Mom Quilts posted a great tutorial for these adorable fabric storage cubes. It's easy to follow, they're quick, and you can make them in any size you want! When I first saw the tut I made a big one to put my paper patterns in, and now I've got these little beauties to keep my buttons safe. P.S. Since I got the fabric from the leftovers bin at spotlight and cardboard from grocery boxes, these things cost about 20c each for me to make. Cost-efficient, no?

Fabric storage cubes


So that's the good news this week. I wonder when I will post again... I am going to make a tutorial for a book/scheduler cover in the not-too-distant future, so we'll see how we go. Au revoir dear friends, I need to tidy the house for an inspection.

~Jessica
Friday, February 27, 2009

Companion cube softie tutorial

Hello world,

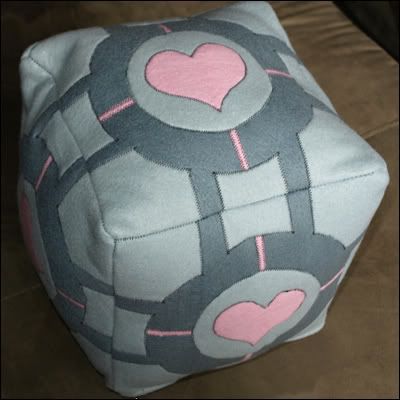
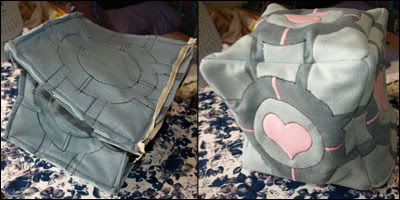
Just the other day I finished making this lovely companion cube softie for my darling EJ for our anniversary on 6 March:

Companion Cube


If you don't know what a companion cube is, you can find out here. Basically, it's from the game Portal. You use it to help you complete the game's tasks. And the cake is not a lie.
Anyway, I decided that I would make one of these for my honey because I know he'd appreciate the effort. And I thought I'd post a tutorial of it in case anyone else thought it was a good idea. :)

Materials and tools

  • Dark grey felt - you'll need a fair amount of this, 60x90cm at least if you want to make one the same size as mine, i.e. 25x25x25cm when finished.
  • Light grey felt - I got half as much as the dark grey
  • Pink felt - you only need a little bit of this, enough for 6 hearts and 24 little lines.
  • Cotton thread - I chose black as a contract, you can make your own decision. :)
  • Stuffing/hobby fill - Use whatever you can find. If you're into repurposing, get an old pillow or two from the op-shop and use the filling in there.

Method

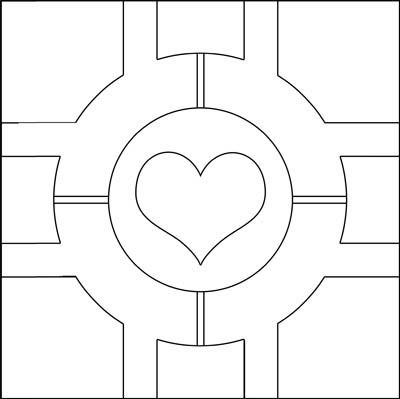
1. Download my pattern by clicking on the image below, or make your own. As I mentioned above, this pattern is to make a cube that's 25x25x25cm when finished. Print it, stick the two pages together and then cut out only the main square. Don't cut it up into little pieces until I say to further on. By the way, I've included 1cm seam allowance around the perimeter of the square only - the rest doesn't require it because the felt won't fray.

Companion Cube - pattern


2. Use the square pattern to mark out six squares on your dark grey felt. They'll be 27x27cm because of the 1cm seam allowance. Cut them out.

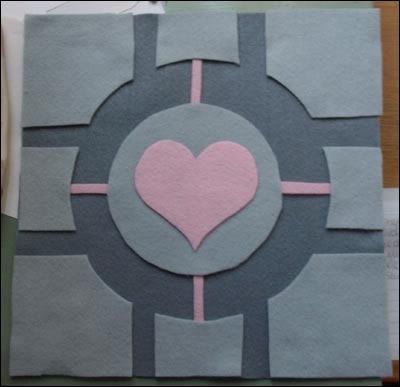
3. Cut out of the pattern the areas that will be light grey - i.e. a corner piece, one of the little kinda C-shaped pieces in the middle of each edge, and the circle. Use these to mark on the light grey felt. You will need 24 corner pieces, 24 C-shaped pieces and 6 circles. Cut out your felt.

4. Cut out from the pattern the heart and one of the little lines that go from the circle to the C-shaped pieces. Cut 6 hearts and 24 lines from the pink felt - make the lines a bit longer than the pattern piece.

5. When you arrange all the pieces, each face should look like the picture below.

Companion Cube - cut pieces


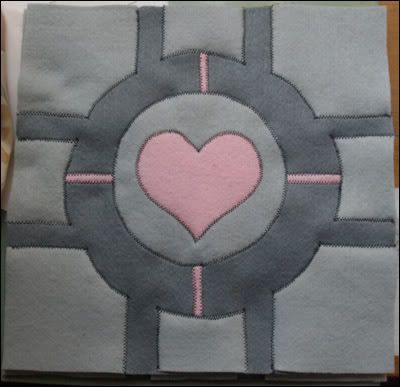
6. Now it's time to applique all the pieces in place on all the faces. I did them in this order: corner pieces, little pink lines (so their ends end up beneath the other two pieces), C-shaped pieces, applique the heart to the circle, then the circle to the face. When you're done, the faces should look somewhat like this:

Companion Cube - appliqued


7. If you want to make it more true to the game, you could stuff the corners and C-shaped pieces now, but I didn't think it was necessary. The next step is to install a zipper between two of the faces. If you know how, go ahead and do it, then skip ahead to step 10. If not, I'll explain how I do it, even though it's a bit... unprofessional. :)

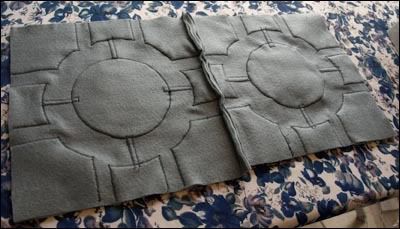
Place two faces right sides together and run a seam with 1cm allowance down one of the edges. Use a straight stitch with the longest length your machine will allow.

Companion Cube - zip seam


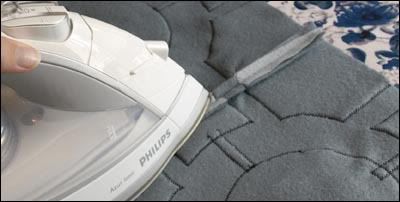
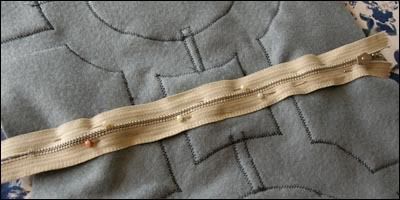
8. Iron the seam allowance open, then pin your zipper over top of the seam.

Companion Cube - iron zip seam

Companion Cube - pin zip


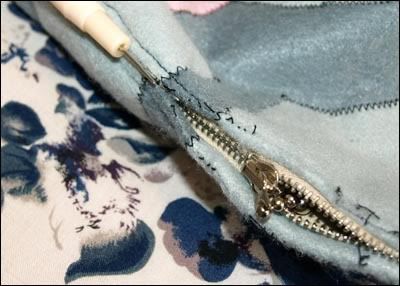
9. Use a zipper foot and sew down the length of the zipper, turn, and up the other side. Now you can unpick the seam, et voila! A zipper for you.

Companion Cube - unpick zip seam


10. Open the zipper. Proceed to making the cube. Now, I will try to explain it here but you'd do will to look at this cube tutorial, which most likely explains the whole cube-making process a bit better.

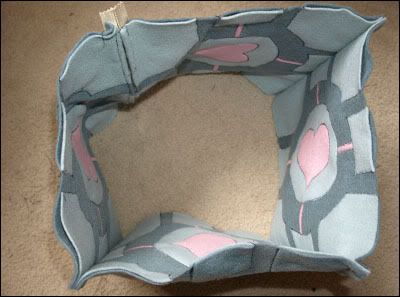
Okay! Get two more faces and attach them with a zigzag stitch so that you form a shape like the one below. When you're doing this, make sure to start and end your seams 1cm away from the edge of the fabric. This comes into play when you attach the last two faces.

Companion Cube - 4 sides


11. Now take one of your final faces and attach two opposite edges of it to corresponding edges in the existing work, as pictured below. This is why we left that 1cm at the edges of the seams, so that you have a nice clean edge to sew these seams. Leave the same 1cm at each end again for these seams.

Companion Cube - 5 sides


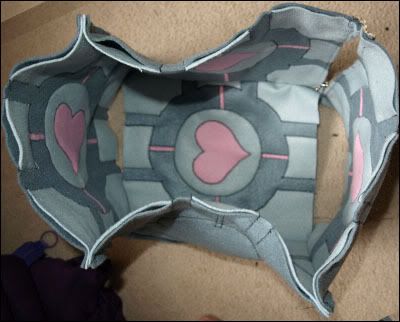
12. Okay, now it's time to create some square corners. Take one of the remaining open edges and fold in the two faces on the sides so that you get a flat edge to work with, like pictured below. Pin it lots and then run a seam along this edge, but don't leave 1cm at each end this time. Repeat with the opposite edge.

Companion Cube - tricky bit


13. Repeat steps 11 and 12 for the remaining face. Aren't you glad I directed you to that other cube-making tutorial?

Now you should have a cube like below. Turn it right side out through the open zipper.

Companion Cube - turn


14. Now get out your stuffing and fillerup!

Companion Cube


And there you go, you are the proud owner of your very own companion cube softie.

I hope you liked this tutorial, and I'd love to see a picture of any companion cubes you make!

~Jessica