Friday, February 27, 2009

Companion cube softie tutorial

Hello world,

Just the other day I finished making this lovely companion cube softie for my darling EJ for our anniversary on 6 March:
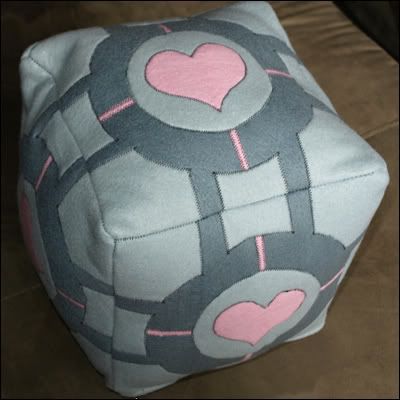
Companion Cube


If you don't know what a companion cube is, you can find out here. Basically, it's from the game Portal. You use it to help you complete the game's tasks. And the cake is not a lie.

Anyway, I decided that I would make one of these for my honey because I know he'd appreciate the effort. And I thought I'd post a tutorial of it in case anyone else thought it was a good idea. :)

Materials and tools

  • Dark grey felt - you'll need a fair amount of this, 60x90cm at least if you want to make one the same size as mine, i.e. 25x25x25cm when finished.
  • Light grey felt - I got half as much as the dark grey
  • Pink felt - you only need a little bit of this, enough for 6 hearts and 24 little lines.
  • Cotton thread - I chose black as a contract, you can make your own decision. :)
  • Stuffing/hobby fill - Use whatever you can find. If you're into repurposing, get an old pillow or two from the op-shop and use the filling in there.

Method

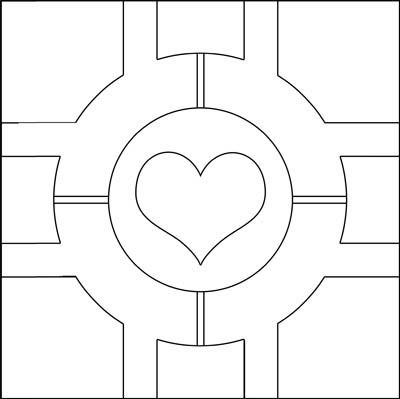
1. Download my pattern by clicking on the image below, or make your own. As I mentioned above, this pattern is to make a cube that's 25x25x25cm when finished. Print it, stick the two pages together and then cut out only the main square. Don't cut it up into little pieces until I say to further on. By the way, I've included 1cm seam allowance around the perimeter of the square only - the rest doesn't require it because the felt won't fray.

Companion Cube - pattern


2. Use the square pattern to mark out six squares on your dark grey felt. They'll be 27x27cm because of the 1cm seam allowance. Cut them out.

3. Cut out of the pattern the areas that will be light grey - i.e. a corner piece, one of the little kinda C-shaped pieces in the middle of each edge, and the circle. Use these to mark on the light grey felt. You will need 24 corner pieces, 24 C-shaped pieces and 6 circles. Cut out your felt.

4. Cut out from the pattern the heart and one of the little lines that go from the circle to the C-shaped pieces. Cut 6 hearts and 24 lines from the pink felt - make the lines a bit longer than the pattern piece.

5. When you arrange all the pieces, each face should look like the picture below.
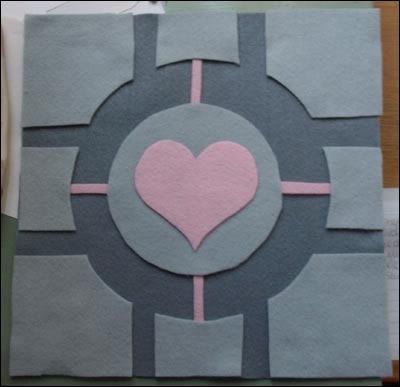
Companion Cube - cut pieces


6. Now it's time to applique all the pieces in place on all the faces. I did them in this order: corner pieces, little pink lines (so their ends end up beneath the other two pieces), C-shaped pieces, applique the heart to the circle, then the circle to the face. When you're done, the faces should look somewhat like this:
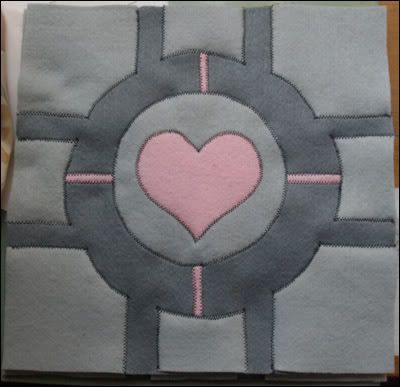
Companion Cube - appliqued


7. If you want to make it more true to the game, you could stuff the corners and C-shaped pieces now, but I didn't think it was necessary. The next step is to install a zipper between two of the faces. If you know how, go ahead and do it, then skip ahead to step 10. If not, I'll explain how I do it, even though it's a bit... unprofessional. :)

Place two faces right sides together and run a seam with 1cm allowance down one of the edges. Use a straight stitch with the longest length your machine will allow.
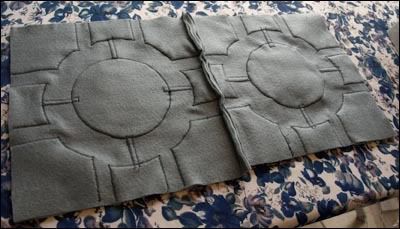
Companion Cube - zip seam


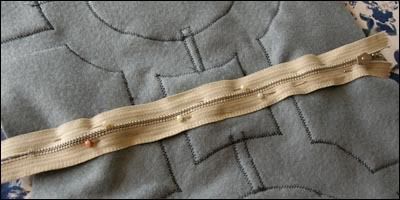
8. Iron the seam allowance open, then pin your zipper over top of the seam.
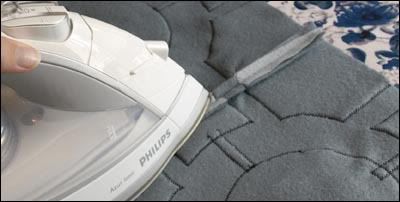
Companion Cube - iron zip seam

Companion Cube - pin zip


9. Use a zipper foot and sew down the length of the zipper, turn, and up the other side. Now you can unpick the seam, et voila! A zipper for you.
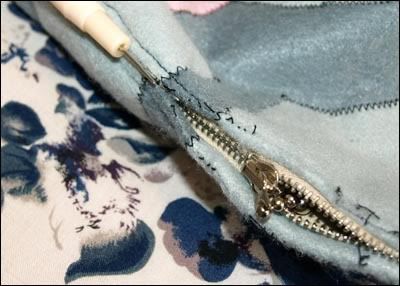
Companion Cube - unpick zip seam


10. Open the zipper. Proceed to making the cube. Now, I will try to explain it here but you'd do will to look at this cube tutorial, which most likely explains the whole cube-making process a bit better.

Okay! Get two more faces and attach them with a zigzag stitch so that you form a shape like the one below. When you're doing this, make sure to start and end your seams 1cm away from the edge of the fabric. This comes into play when you attach the last two faces.
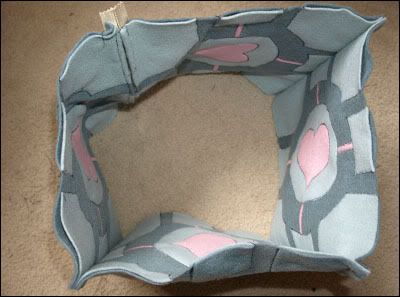
Companion Cube - 4 sides


11. Now take one of your final faces and attach two opposite edges of it to corresponding edges in the existing work, as pictured below. This is why we left that 1cm at the edges of the seams, so that you have a nice clean edge to sew these seams. Leave the same 1cm at each end again for these seams.
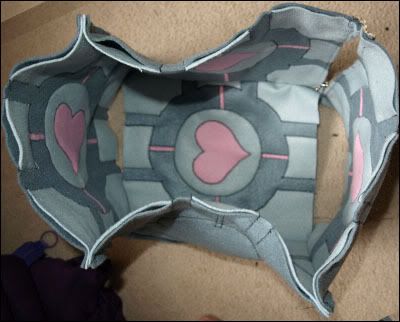
Companion Cube - 5 sides


12. Okay, now it's time to create some square corners. Take one of the remaining open edges and fold in the two faces on the sides so that you get a flat edge to work with, like pictured below. Pin it lots and then run a seam along this edge, but don't leave 1cm at each end this time. Repeat with the opposite edge.
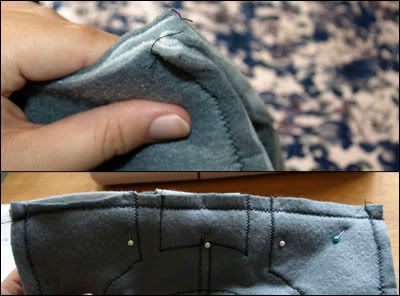
Companion Cube - tricky bit


13. Repeat steps 11 and 12 for the remaining face. Aren't you glad I directed you to that other cube-making tutorial?

Now you should have a cube like below. Turn it right side out through the open zipper.
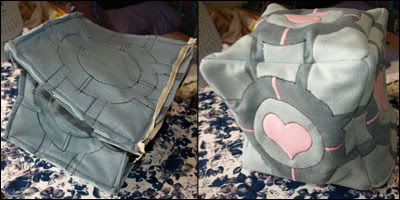
Companion Cube - turn


14. Now get out your stuffing and fillerup!

Companion Cube


And there you go, you are the proud owner of your very own companion cube softie.

I hope you liked this tutorial, and I'd love to see a picture of any companion cubes you make!

~Jessica

Wednesday, February 25, 2009

Spats Tutorial

Hello world,

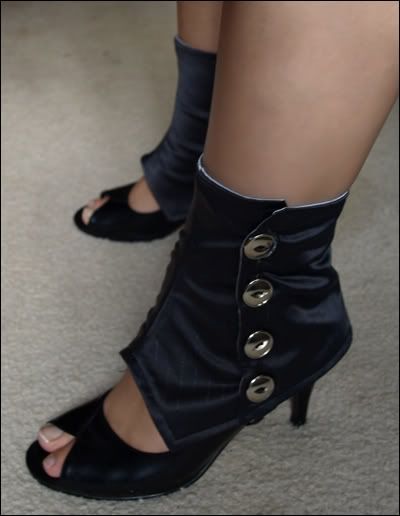
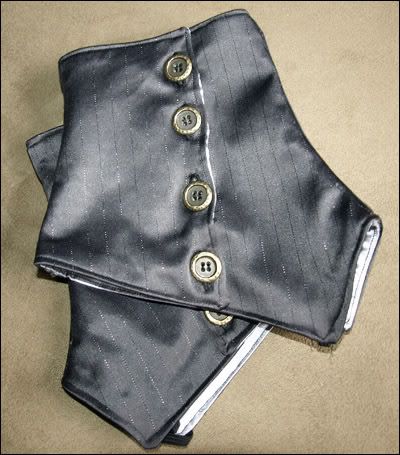
Upon a few requests over at Threadbanger, I've decided to put together a quick tutorial for the spats I made to match my she-tails:

Spats


Apologies that I don't have pictures of the first couple of steps - I began making this pair before I decided to make a tutorial! :)

Materials and tools
  • Main fabric - at least 1x0.5m
  • Lining fabric - at least 1x0.5m
  • Matching cotton thread
  • Iron-on interfacing
  • Elastic - 2x 10-12cm lengths; use thin elastic, like 5-10mm width


Method

1.
Download Thank you for not being perky's spats pattern by clicking the image below:

Spats - pattern


2. Print the pattern and cut it out. Place the pattern pieces on the interfacing with the printed side up and cut two of each pattern piece. Then place your pattern pieces on the interfacing printed side down and cut two more of each piece. This way you will have one spat for each foot. You know what I mean! It's easier to visualise than to explain.

3. Separate your interfacing pieces in two identical piles (each containing 1 A and 1 mirrored-A, 1 B and 1 mirrored-B, 1 C and 1 mirrored C) and iron one pile to your main fabric, one pile to your lining fabric. Make sure you leave enough space around them so that when you cut them out you can add 1cm seam allowance. Also make try to ensure you put your fabric's max stretch going across the pattern pieces. Cut them all out with 1cm seam allowance.

4. For both the two mains and the two linings, sew the seams as indicated by the notches in Thank you for not being perky's pattern, i.e. piece B on the left side of piece A, C on the right side of A. You can see one main and one lining complete below.

Spats - sew pieces together


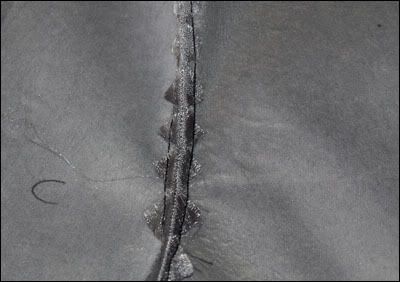
5. Now snip little triangles out of the seam allowance and iron it open. Doing this will prevent puckering in the curved seams. Run a topstitch down both sides of the seam, securing the seam allowances as shown below.

Spats - sew open seam allowance


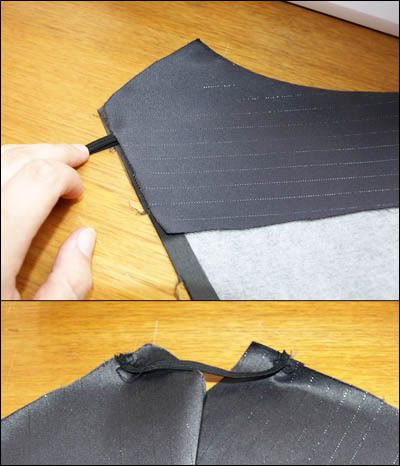
6. You will now be able to see the general form the spats will take. Fold over the front of one of the mains (i.e. fold piece C over onto piece A) so that the two peaks at the bottom of the front match, as you can see in the top part of the image below. You can see the position where the elastic should be attached. Mark this position on both your mains.

Spats - elastic


Baste your elastic in place on the main fabric. Make sure you sew it on the right side of your main, right near the edge of the fabric so that it will be hidden in your seam allowance in the finished product. (See the bottom part of the image above.)

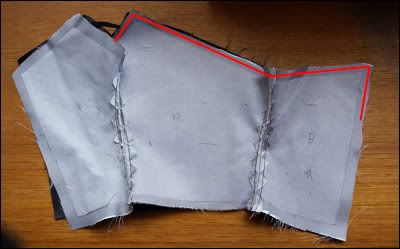
7. Now it's time to sew the first part of the perimeter. Place main and lining right sides together, then pin along the edge as indicated in the image below. It's important to do the perimeter seam in two parts, because the elastic pulls too much to get a neat seam otherwise. Make sure the elastic is hidden inside, between the main and lining.

Spats - sew perimeter 1


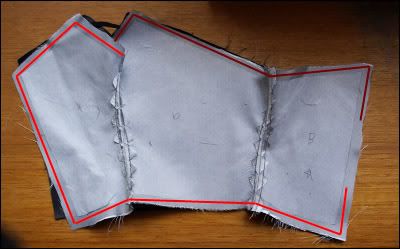
8. Now pin and sew the other part of the perimeter seam, leaving a gap for turning on the straight edge as indicated below. Oh yes, because of the curved seam, that little bit in the middle at the top of the work in my photo is just folded over. The seam really is continuous, since you will join the second part of the perimeter seam at the corner where the first seam ended. Once again, easier to do than to explain. :)

Spats - sew perimeter 2


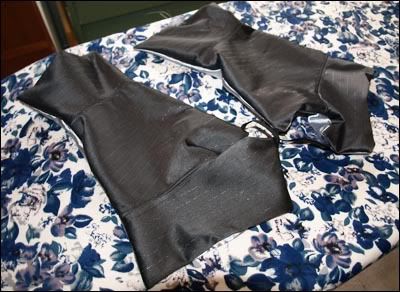
9. Trim the corners and then turn your spats right side out through the hole you left in the last step. Use something skinny to push the corners out so they're nice and sharp and heat up your iron.

Spats - turn


10. Iron it flat, tuck in the raw edges around the turning hole and pin it shut.

Spats - ironed


11. Run a topstitch around the perimeter of your spats to give them a polisehed look and to close up the turning hole.

Spats - topstitch


12. Add buttons and button holes and you're done! Note - if you suffer from the dreaded cankle like I do, you will want to position the buttons quite close to the edge of the spats so as to give you as much wriggle room as possible. Those with slender ankles, I envy you.

Et voila!

Spats - complete


Alright. I hope you enjoyed this tutorial and that you will make yourself many and varied spats, because it's time they came back.

As a side note, I decided I will give this tutorial's pair away to the first person who leaves a comment saying they're interested and with a way for me to contact them. I don't want to call it a competition, because I disappointed myself by doing one very messy button hole and accidentally snipping a tiny hole (like 4mm) in the middle of the lining of one of the spats. As much as it pains me to be honest about these stuff-ups, I'd feel worse to send these away to someone without warning them about what to expect. Nonetheless, they're still pretty darn kewl, and no-one will see the lining hole when you're wearing them, and the button hole should be mainly covered by the, y'know, button. :)

[EDIT] Congrats Allegra, you will be seeing some spats in the mail shortly.

~Jessica
Friday, February 20, 2009

New she-tails vest & spats, living room decor and other news

Hello world,

The first piece of news that I'd like to share is that I've added a new gadget on the righthand side of my page - Followers. That's right! If you want to keep up-to-date with what I'm posting, just click the link to follow this blog. If you're using Google reader then my posts will appear in there, or if you are using another RSS reader you can click the 'Subscribe to' link further down the righthand column of the blog.

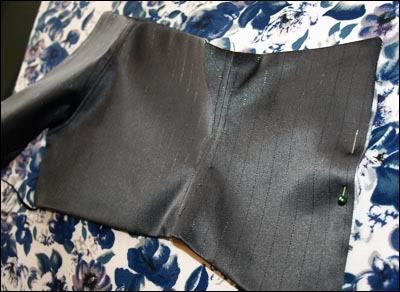
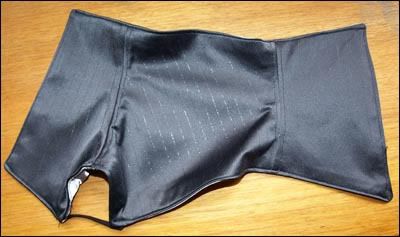
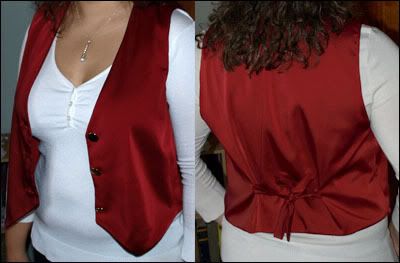
Now to business - yet another two items I can cross off my two steps forward one step back future projects list. Behold my she-tails and matching spats!

She-tails and spats front


She-tails and spats back


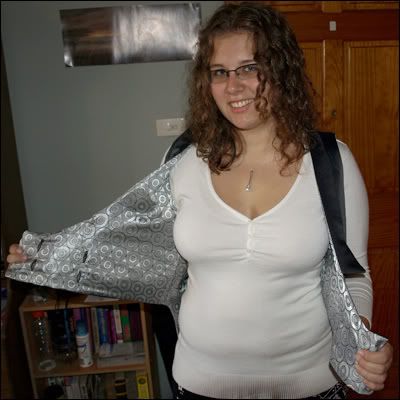
She-tails lining


Spats


I am so proud. I think everyone should dress like this all the time. :)

To make this I used a pattern I made from tracing an old waistcoat EJ got from an op-shop. I did this a while ago to make him a red waistcoart to match my formal dress for his work's annual awards night:

EJ's waistcoat


Not bad for an afternoon's work, eh? Anyway, I altered that pattern to have a scoop, be double-breasted and have the tails at the back, plus added some lapels for good measure. I love the materials that I used - the pinstripe suiting is lovely, and the silver lining was just a scrap in the offcuts bin that I could not resist.

As to the spats, I downloaded the pattern from Thank you for not being perky. I love them, too, and I think I'll be wearing them even more often than the she-tails just because they're easier to get away with. And tres trendy. And cozy, too, which would be great if we had, you know, winter.

Now that the beginning of Autumn semester at UOW is drawing nigh, I probably won't have as many posts. However, I am determined not to let this blog fade into the background and I will keep updating and checking for any responses people might post. While real schoolwork might be the enemy of the blogging world, I have no doubt that procrastination will come to its aid. :)

I've also begun tutoring again now that the high school kids have gone back to work. If you're interested, I tutor Mathematics for years 7-10 (and revision for adults) and English for years 7-8 in the greater Wollongong area, and you can get hold of me via Sharron at Illawarra Home Tuition on 02 4261 3000 - just mention you are interested in working with Jessica.

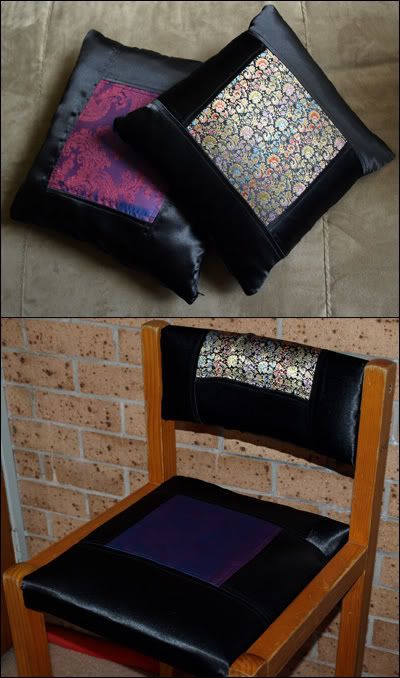
I also wanted to post a couple of other older projects that I never got around to photographing and posting: my lounge cushion covers, which I love lots and lots, and my matching reupholstered stools:

Lounge chusions and stools


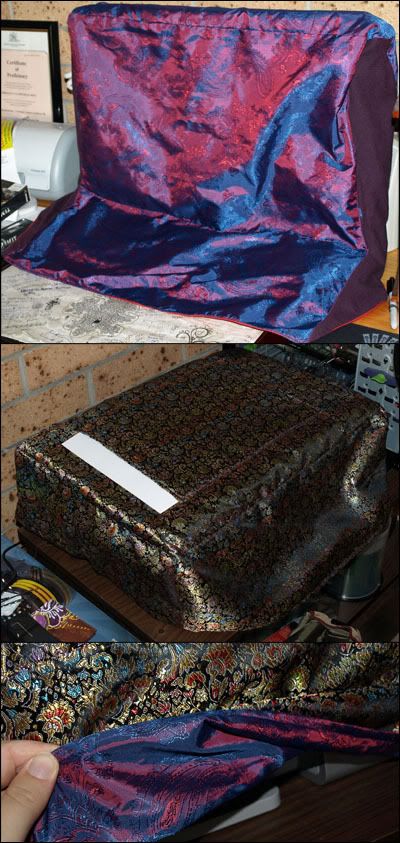
I made these a long time ago now, back when we first got the new lounge. There's about 14 cushions, and they have the brocade on one side, the paisley on the other. And more recently, I made covers for both the computer monitor/keyboard and printer:

Computer monitor/keyboard and printer covers


I especially liked making them reversible and adding the pouch for the printer paper. :)

If anyone is interested, I'd be happy to accept any tutorial requests that people might have. I can't guarantee that they'll be strictly professional, but I can assure you that I will do my best!

Anyway, I think that'll do for today (this post has been a long time in the making, actually), so I'll say goodbye.

~Jessica

Tuesday, February 10, 2009

Victoria Bushfires

Hello world,

If you haven't heard about the devastation of the bushfires in Victoria, you're not Australian and you don't watch the international news in your country. The fires exploded on Saturday, when the temperatures reached the hottest ever recorded down there. In Nowra, NSW it got to 44°C, I don't know the actual temperature was down in Vic. There's been fires burning around the country for a while, something we've come to begrudgingly expect every year around this time, but no one was ready for the combination of blistering heat and raging winds that swept the fires over central Victoria, obliterating small communities so swiftly that many people have died while attempting to escape. According to the news cast I am watching right now, the death toll stands at 173, but unfortunately this number will probably rise as they continue to sort through the rubble of the some 700 homes razed by the wildfires. The fires are still burning.

Victoria bushfires - image courtesy of welt online
Image courtesy of welt online

Victoria bushfires - image courtesy of welt online
Image courtesy of welt online

Victoria bushfires - image courtesy of welt online
Image courtesy of welt online


Like everyone, I am completely heartbroken about the loss of life in this unpreventable disaster. Donating to one of the many appeals is my small attempt at trying to help those in need. Every bit helps, and you can contribute online using the following links:

The Salvation Army accepts both Australian and International donations - This is the charity that I donated to, and it's great because it also accepts international donations as well.

National Australia Bank Victorian Bushfire Relief Fund - The NAB kicked off this fund with their own $1 000 000 donation, and you can donate at NAB branches or by direct deposit.

The Australian Red Cross - You can make donations via their website using Visa, Amex, Mastercard or Diner's card.

Bendigo Bank Bushfire and Flood Appeal - You can also donate via Bendigo Bank branches or follow this link to their online store where you can donate using your Visa or Mastercard.

If you would like to contribute using PayPal - I will accept donations and pass them on to one of the above Bushfire appeals. Leave a comment below with a way for me to contact you and I will gat back to you as soon as possible.

There are many different ways to contribute other than those listed here, however I wanted to post a few options in the hope of spurring on some help for those affected by this disaster.

~Jessica

Tuesday, February 3, 2009

Past Projects

Hello world,

I'm working on a new post, but I need to finish a couple of projects before I submit it otherwise it will be incomplete. :) In the mean time, I thought I might post a few past projects here for posterity.

So, without further ado, behold:

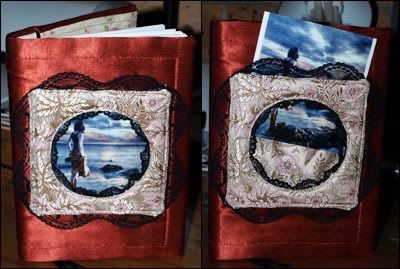
Diary with a view


I figured if I was going to be looking at this uni diary every day, it ought to be something worth looking at.

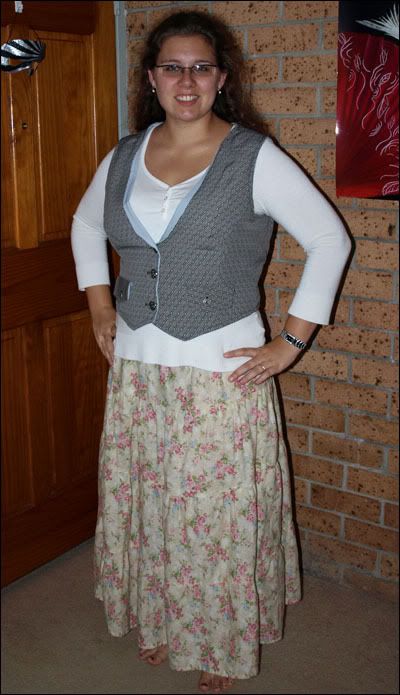
Peasant skirt and vest


The peasant skirt was my first project after I got my sewing machine for xmas in 2007. The tutorial I followed is here. The vest ('Franzi') I made with a free printable pattern from Burdastyle; you can find the pattern here.

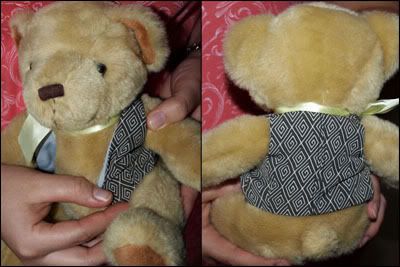
Miele's vest


The Burdastyle pattern I used above comes with a zoomed-out pic of what your pattern should look like when you stick it all together. I decided to take those tiny versions of the pattern and make a matching vest for our teddy bear, Miele.

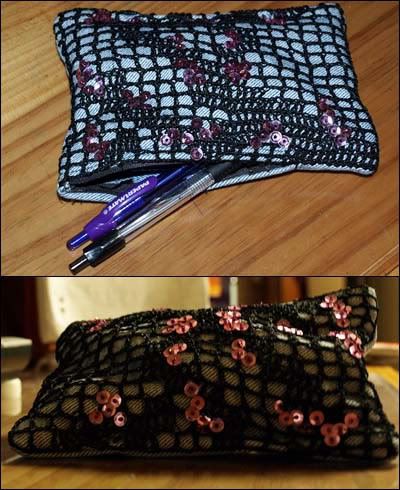
Filet crochet cherry blossom pencil case


I needed something for uni. I just made a kinda random branch shape in black filet crochet and sewed it to a rectangle the size I wanted my pencil case, then painstakingly hand sewed the sequins and beads for cherry blossoms. I love it. I just wish I knew where it was right now...

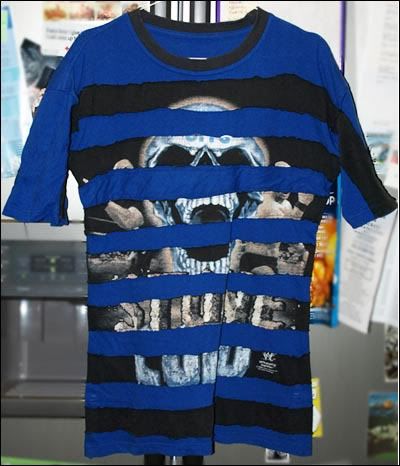
Stone cold tshirt stripe mod


I made this for EJ following an episode of Threadbanger which you can find here. Too bad he refuses to wear it, I think it's tres stylish. :)

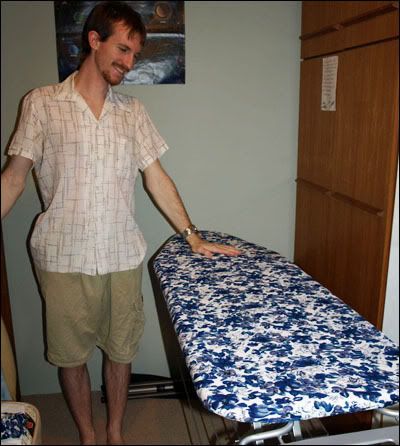
Ironing board


Our ironing board was showing signs of wear largely because its cover was cheap and nasty. We remade the cover by cutting out a bunch of layers from a woollen blanket and making a drawstring cotton cover. EJ was pleased.

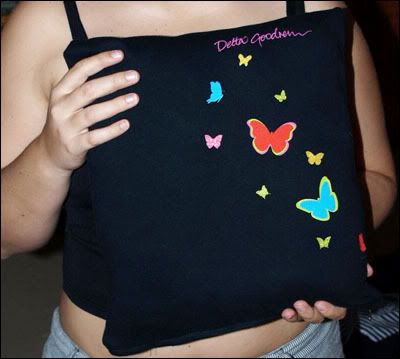
Delta Goodrem Visualise tour cushion


I loved my tour tshirt from Delta Goodrem's first tour, but it was too short-waisted and high-necked for me. I made a snuggly cushion cover instead. I sleep with it every night.

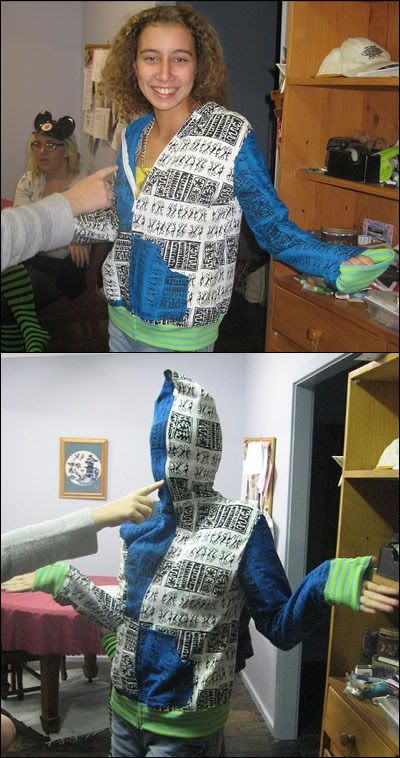
Hoodie for my sister


I made this hoodie by request for my sister's fifteenth birthday. Yes, she wanted the zipper to cover her face. I love the material - old 80s O&E stuff from my grandmother's garage.

Crochet tshirt collar


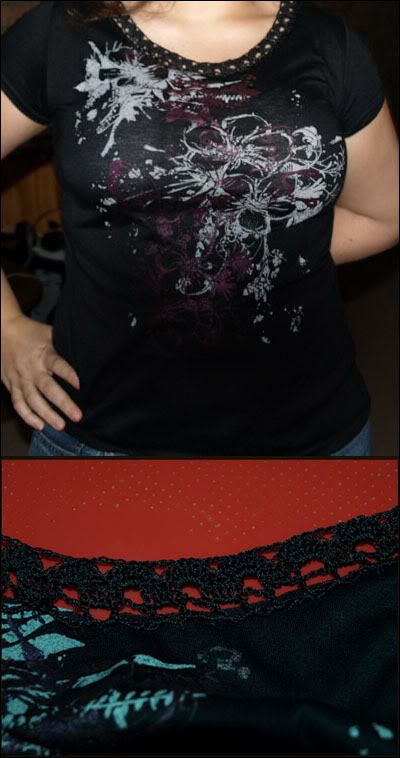
As I mentioned above, high necks aren't my deal. I cut the neck out of this shirt to make a scoop and crocheted the neckline. Since this photo I also cut off the sleeves and crocheted new ones, but I can't be bothered getting out the camera.

Combi Cushion


I made this for my brother's 21st birthday, along with a monkey suit. There are photos of the the suit, but they must be at my mum and dad's place. I will post them whenever I get them, because it was awesome, even if I do say so myself.

I made a tutorial on how to make your own combi cushion, which you can find here.

Embroidered flower shirt


One of my favourite shirts that I got in Canada is reaching its last days, so I traced it to make this one. The shape isn't quite the same as the original shirt, but I still like it. And the rose was so much work, but I love it. And it hasn't died in the washing machine yet, so that's great.

Pyjamas


My last thin pair of jammies was worn out, so I used a tshirt pattern I had on hand and Burdastyle's yoga pants pattern to make these new ones.

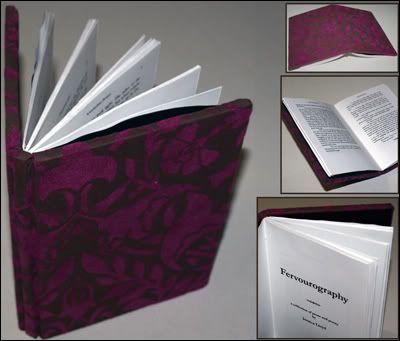
Fervourography - handbound self-publication


It's a collection of prose and poetry. I am so proud of it, and I look forward to making other self-publications in the future. I sell them on Etsy.

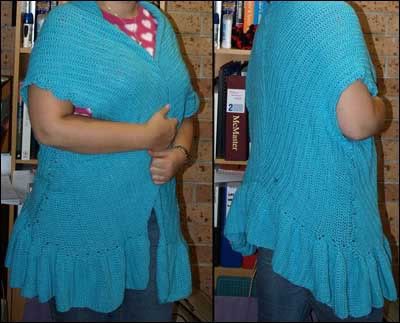
Bamboo crochet cardi


I used a crochet pattern I got from the awesome Antique Pattern Library to make this beautiful cardigan. I got the bamboo yarn on special from Spotlight, it's the same kind as what I used to make my fruit cozies.


So there you have it! All the projects that I have not yet posted on this blog that I already had sitting here on my computer. Any questions, feel free to comment and I will get back to you asap.

~ Jessica