Monday, January 26, 2009

Happy Australia Day - Lamington Cupcakes Recipe

Hello world,

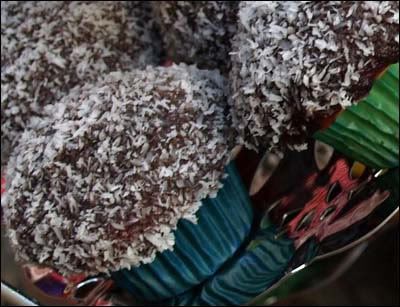
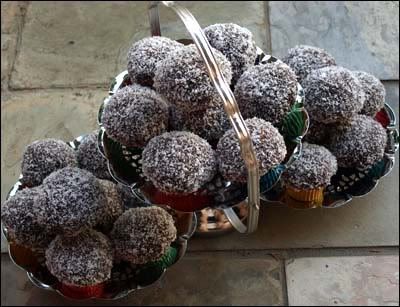
Happy Australia Day! Yes it's 26 January again and this time I decided to spread the cheer with these scrumptious lamington cupcakes. A little twist on tradition but still with the essence of Australia wrapped up in them. Mmmm...

Lamington Cupcakes


Ingredients

1 quantity plain/vanilla/butter cake mix (mine used 125g butter, 2 eggs, 3/4 cup sugar, 2 cups SR flour, 4 drops vanilla, 1/2 cup milk)

1 cup sugar

1/3 cup water

1/9 cup cocoa

1/2 tsp vanilla

Desiccated coconut

Method

1. Spoon your cake mix into prepared cupcake tray and bake in preheated 180-190°C oven for about 10 minutes - the tops should spring back when touched and be slightly browned. Turn them out on a cake rack and let them cool.

2. Put sugar and water together with sifted cocoa into a saucepan and bring to the boil, stirring to make sure the sugar dissolves.

3. Simmer gently for about 12 minutes without stirring.

4. Remove from heat, add vanilla and stir for 1 minute.

5. Pour into a bowl and allow to cool a little (the mixture should thicken up a bit).

6. Dip the top of all your cakes into the icing and set them on the cake rack again to set. While they're doing that, pour some desiccated coconut into a bowl.

7. Dip each of your cupcakes into the icing again, this time rolling them in the desiccated coconut afterwards. Make sure they are nicely covered.

8. Leave then on the cake rack to cool and set.

9. Enjoy!

Lamington Cupcakes


Happy Australia Day everyone,

~Jessica

Friday, January 23, 2009

Seatbelt covers tutorial - His & Hers

Hello world,

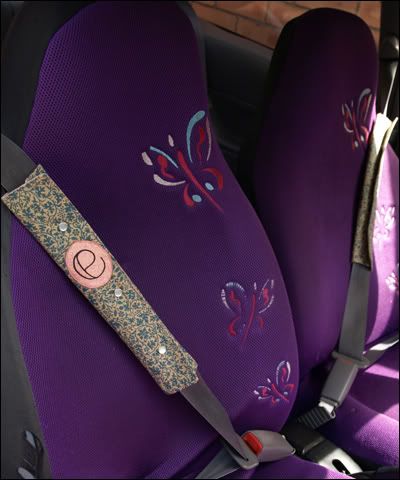
As often happens when I get an idea in my head, I've produced another pretty thing. :) Check out our new personalised seatbelt covers!

Seatbelt covers

Seatbelt covers


I think they're utterly adorable. And a good gift idea, too. You don't have to make then pretty and girly like mine - you could use someone's favourite football team's colours, or anything you like.

As I mentioned previously, I decided to make my own seatbelt covers because the one that I had in my car was a little too short for my liking. I got sunburnt and I was wearing a singlet top, and the end of it rubbed against the burn every time I moved. This also reminded me of how the velcro closure sometimes rubbed too. Another factor was that we only had one cover, but there's two of us, and if we were ever going out and I forgot to get EJ to give me the cover, then my pretty blouse would get ruined from rubbing against the seatbelt for as little as five minutes. Plus it was boring!

So here's a tutorial showing how to make your own long, pretty seatbelt covers.

Materials and tools

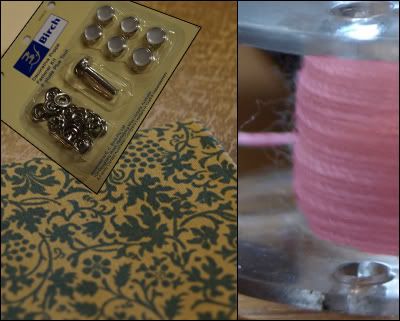
Seatbelt covers - materials


  • Fabric.
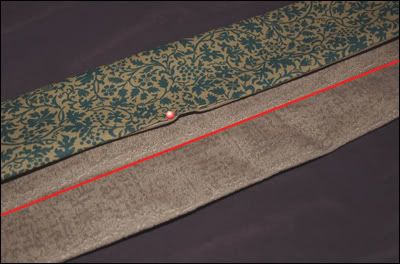
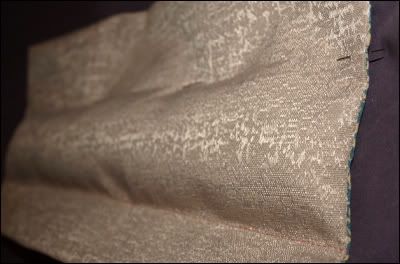
    You want something kinda sturdy for the inside (the part that will be against the belt) and something soft and forgiving for the outside (the part you'll see and will rub against your clothes). Avoid stretchy fabrics. I used goldish upholstery fabric for the inside and blue printed cotton for the outside. Because the cotton is flimsy, I used iron-on interfacing for that piece.

  • Stuffing.
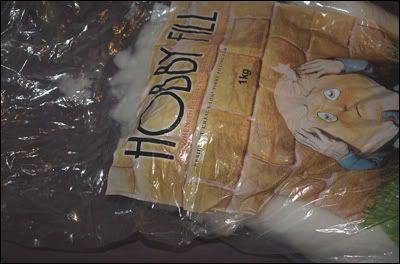
    I used hobby-fill (used for stuffed animals, etc), but you could also use batting, recycle a cushion/pillow, or just use fabric scraps.

  • Cotton.
    I used pink because it would match my appliques.

  • Snap button fasteners.
    You don't have to use these, velcro would do, but I've mentioned my gripes with velcro above.


Method

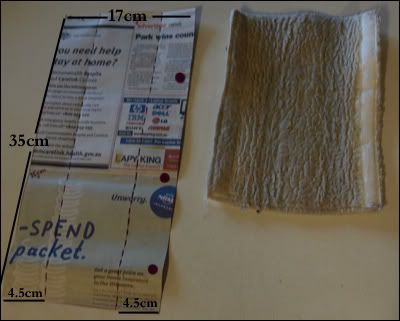
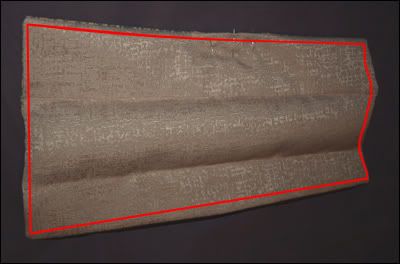
1. Make your pattern. It's so easy - just a rectangle! So I've not uploaded a pattern for you to print. I used my existing seatbelt cover as a guide, lengthening it as necessary. You can use my measurements as shown below (17x35cm). Also mark out the intervals at which you'd like your buttons. Since my little snap fastener kit had six buttons and I was making two covers, I marked three buttons down the long edge.

Seatbelt covers - pattern


2. Trace your pattern onto your interfacing, if you're using it, or directly onto the back of your fabric, if not. You just need one rectangle for the inside fabric and one rectangle for the outside fabric for each cover you intend to make. Cut out your rectangles, leaving about 1cm seam allowance. Pin your two pieces right sides together, leaving a space of about 10cm on one of the long edges.

Seatbelt covers - pin


3. Sew around the perimeter with a straight stitch, backstitching at the beginning and end to make sure your seam is secure, leaving space on the long edge unsewn, as pictured below. Trim the corners at 45 degrees.

Seatbelt covers - sew


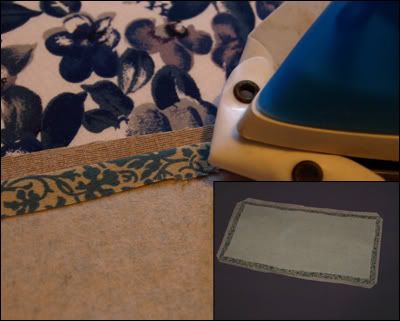
4. Fold back and iron flat your seam allowance around all the edges. This will make for crisper edges after turning.

Seatbelt covers - open seam allowance


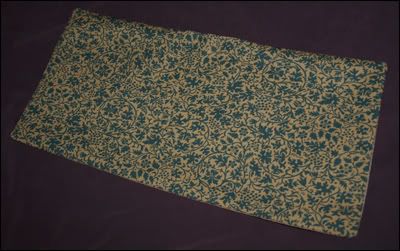
5. Turn your work right side out, using a skewer/knitting needle/crochet hook/pen/whatever to push the corners out and make them nice and sharp. Iron it flat.

Seatbelt covers - turned


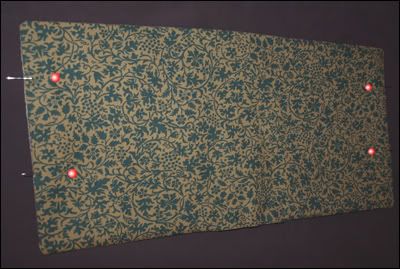
6. Head out to your car and bring a couple of pins and your cover-in-progress. Wrap your cover around the seatbelt like you want it to be when you're done, then at one end use your pins to mark at which intervals your cover will fold.

Seatbelt covers - mark folds


7. Fold your cover in half lengthways and add two more pins to mark the folds at the other end.

Seatbelt covers - mark folds at other end


8. Pin shut the opening that you used for turning. Fold you cover according to the pins you used to mark them and iron, so that you can see where the folds are going to be.

Now it's time to sew along the first fold. This is the fold FURTHEST from the opening we pinned shut. Make sure you sew the one that's furthest from the opening, otherwise you won't be able to stuff it.

Seatbelt covers - sew first fold


9. Grab your stuffing, whatever it may be, and fill the centre section of your seatbelt cover. Do not overstuff it - this is just to create a little bit of cushioning between you and the belt. Add a little bit of stuffing at one end of the middle section, then pin along the second crease at that end, then stuff the other end, pin the crease at that end, then stuff the middle and pin the middle of the crease closed, too. It should look like the second image below.

Seatbelt covers - stuffing


Seatbelt covers - stuff


10. Now sew a straight stitch along the second crease, closing off the stuffing. Finally, run a straight topstitch around the entire perimeter, closing the opening we used for turning and stuffing.

Seatbelt covers


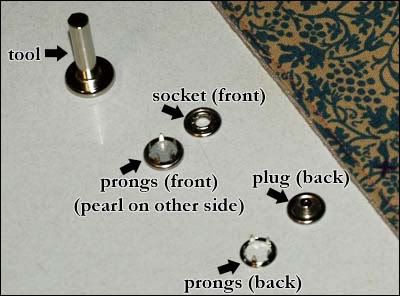
11. It's time to attach the snap fasteners. The kit that I'm using cost about $4, but the ones without the pretty mother-of-pearl covers were even cheaper. It came with six buttons, a single set of which you can see pictured below.

Seatbelt covers - snap fastener parts


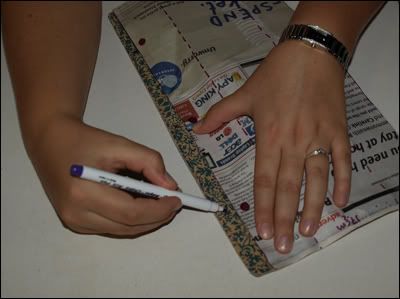
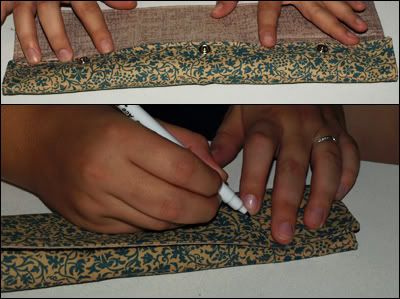
12. First you need to mark where you're going to place the backs of your buttons - the un-pretty side of the snap fasteners. Fold up your seatbelt covers and think about where you want them to be, then get your pattern and use the marks you made on it to mark the position of the buttons with a fabric pen. Notice that I'm marking this on the good side of the flap that I intend to be on the inside of the finished cover.

Seatbelt covers - mark buttons 1


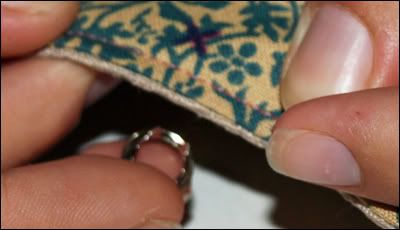
13. Next, take the prongs for the back part of your button and position it underneath one of your marks so that the prongs push up around the mark you made.

Seatbelt covers - back prongs


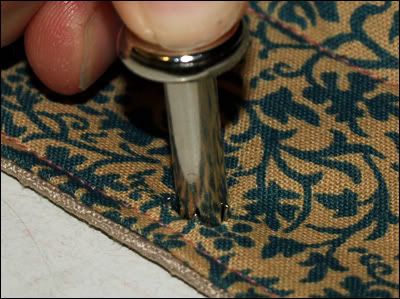
Use the narrow end of the tool that came with the kit to push down your fabric so that all the prongs pierce the fabric.

Seatbelt covers - push prongs through


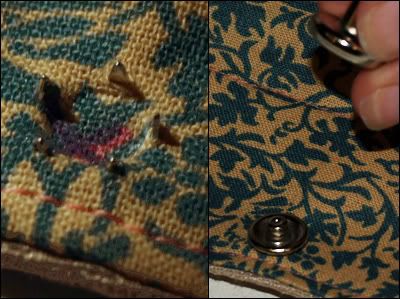
14. Once all the prongs are through your fabric, place the plug piece of the button on top. There's a little groove in the back where the prongs sit. Then position the wider end of the tool from the kit on top...

Seatbelt covers - place socket on prongs


...and hammer it on in. If you don't want to ruin your table, I'd suggest putting a craft mat or some cardboard underneath before you hammer. Repeat for the rest of your button backs.

Seatbelt covers - hammer in with tool


15. Now fold both flaps in so that the front flap is over the back one, covering up the buttons you just hammered in. Get your fabric marker and feel around until you find the nubs of each of the buttons, and mark them out. This will be the position of the top of your buttons.

Seatbelt covers - mark buttons 2


16. Repeat the same process as you did for the button backs, except this time make sure you push the prongs through from the opposite side, so that the pretty part faces outwards (that means that the prongs go through from the side with the blue printed fabric and stick out from the golf fabric, in my case). It's easier to do than to explain. And there you have it, nice secure snap fasteners for your seatbelt covers.

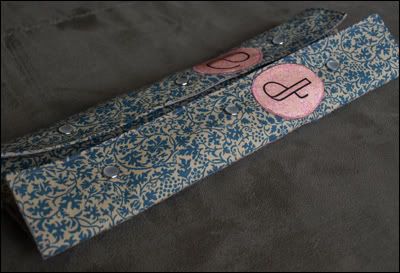
Seatbelt covers - button complete


17. Add any embellishments you wish, and you're done! Congratulations, you are the proud owner of a luxuriously long personalised seatbelt cover that will protect your sensitive skin and pretty clothes from wear and tear.

Seatbelt covers


Seatbelt covers


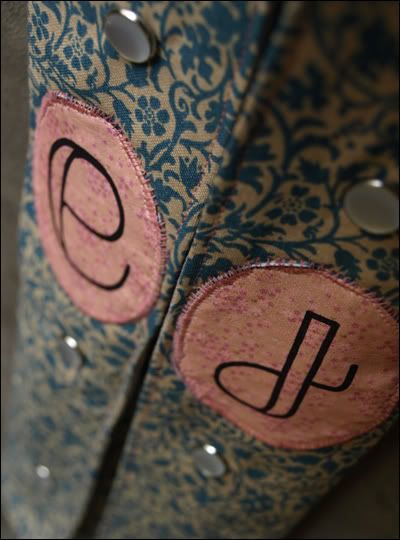
In case anyone is wondering about my His & Hers medallions (E for EJ and J for Jessica), I photoshopped up the images and printed it on some iron-on transfer paper that I bought on special from Aldi. When I began I thought that the medallions would hang off the edge of the front flap, and so I sewed them to ovals of my blue printed fabric (right sides together), snipped the blue fabric and turned it right side out, then appliqued the medallions to the flaps. Had I realised that I had enough space, I would have ironed them directly onto the flaps and saved myself all that trouble. Not to worry, I still love 'em.

Until next time,

~Jessica
Thursday, January 22, 2009

New future projects

Hello world,

It's absolutely sweltering today. I just through everyone should know that! And my mum loved the fruit cozies. Woohoo!

I thought of a few more things of my future projects list. One of them is His & Hers seatbelt covers. We have only one seatbelt cover in our car, which I usually use because I am shorter and so the belt bothers me, and because I'm normally the one wearing a shirt that might get ruined by rubbing against the belt. However, we always have to change it between seats and while that's not really a huge hassle, why not have two? The other reason why I'm going to make these is because I got pretty sunburnt this week while I was visiting my parents (that hasn't happened in a long time) and so when I was driving home the seatbelt really irritated my skin - the cover wasn't long enough to reach all the way from my shoulder to my boobs. So I'm going to make my seatbelt covers longer than the sheepskin one I have on there right now. And the His & Hers thing I just thought of this morning - a bit of fun and personalisation never hurt anyone.

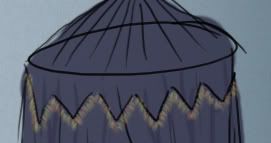
The other project which I'm excited about is the lounge chair awning-thing I want to make. I saw one at a shop once and while I didn't want to fork over the ridiculous price they were asking, it burrowed away into my mind for future reference. Now it's the future. It was a bit like those pretty mosquito nets that people hang over their beds with no intent of keeping away mosquitoes, except it's opaque, and over a lounge chair. I sketched out the idea below (thanks to deathbycanon-stock for the lounge chair pic):

Lounge chair awning


I went into town and got a hula hoop from the toy store to use up the top, and now I am going to bide my time until I have made a bunch of other projects and used up a bit of the backlog of material that's crowding my sewing room. After that I won't feel so bad about going to Spotlight and getting a few metres of gorgeous curtain fabric to make one of these for myself. I recok I'dd add some pretty trim along the top too.

Lounge chair awning trim


I imagine that it'll be a great writing chair when I'm done. Maybe I'll have to figure out a way to affix a light inside though...

~Jessica

Friday, January 16, 2009

Chequebook cover tutorial + pattern

Hello world,

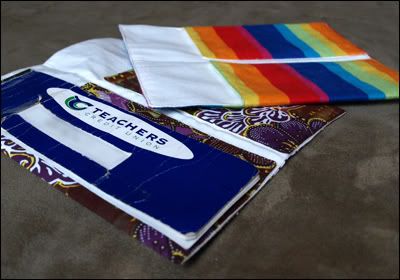
Today did turn out to be productive after all! I finished as much work as I could on Dad's golf programme until he sends me more information, and I made chequebook covers for both EJ and his mum! And now here I am about to put together a tutorial for it. :)

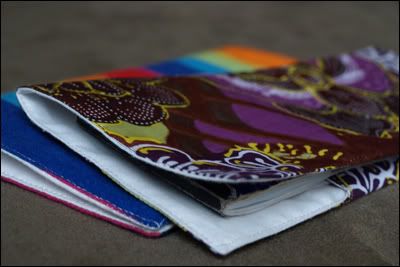
Chequebook covers


Please note that this is a tutorial for Australian-style chequebooks. Australian chequebooks measure about 21.3cm x 7cm and open like a book, with the spine on the short side. I mention this because I originally got the idea for making these from crazy mom quilts' chequebook tutorial, but after making one I realised that our chequebooks must be different to American 'check'boooks, since her tut made a cover that was too short and opened along the wrong edge to slide in our chequebooks. So! Make sure to figure out what kind of cover you need to make before you begin.

Materials and tools

Materials


  • Main fabric - stiff, non-stretch fabric; a good choice is upholstery fabric or denim, OR
  • Main fabric + iron-on interfacing - if you're like me, you'll want to use a more spangly and less sturdy fabric, in which case you'll need to use some interfacing too. I'll be giving instructions for using interfacing.
  • Lining fabric - same deal as your main fabric
  • Cotton to match both main and lining fabric - you can just use one colour if you're not as nit-picky as me
  • Pattern - you can either draw it (it's easy) or download mine below


Chequebook cover pattern

Chequebook cover pattern - click to download


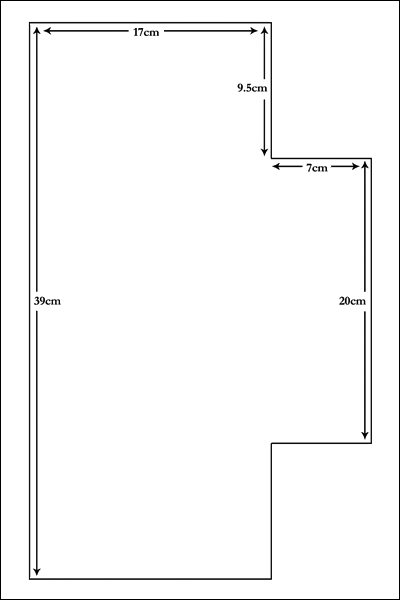
Click the image to download a zip package containing the image above as both a jpg and a psd file in the correct dimensions. The picture is meant to fit an A3 page, so you will need to print it over 2 A4 pages and stick them together.

Alternatively, get an old newspaper or catalogue and draw your own pattern according to the measurements indicated on the image above.

Method

1. Iron all your fabric. Trace the pattern onto your iron-on interfacing twice and cut out both. Place one piece of interfacing on your main fabric and one on the lining. Make sure that you place the interfacing at least 1cm away from the edge of your fabric and that you place it shiney side down. Iron it well, so that the interfacing doesn't peel up at the edges.

Ironing-on interfacing


If you're not using interfacing, trace your pattern directly onto your main and lining fabrics using a fabric marker or taylors' chalk. Cut out leaving about 1cm seam allowance.

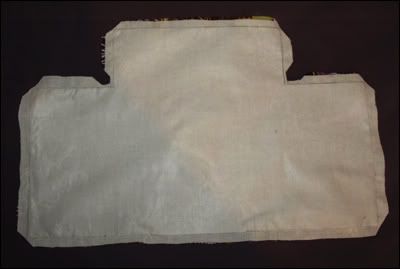
2. Once it is securely attached, cut out your pieces from the main fabric and lining, leaving about 1cm seam allowance. Place the main fabric to the lining, right sides together, pin and sew around the perimeter of your interfacing, leaving a space of 10 or 15cm in the middle of the long edge. Backstitch at the beginning and end of the seam to make it secure.

Cut out


3. Trim the convex corners at 45 degrees, close to the seam. Trim the concave corners close to the seam as pictured, making sure not to trim too close or else the seam will split when you turn it.

Trim the corners


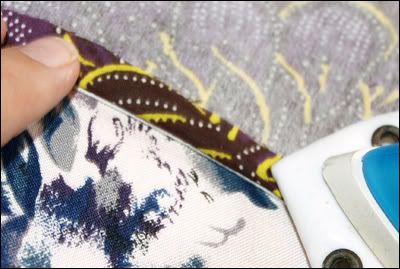
4.Before turning, fold back the seam allowance and iron it flat. This will help to give you crisp edges and make it easier to close the hole. Once all seam allowances have been ironed open, turn the work right side out and use a skewer, knitting needle or something similar to help push out the corners and keep them sharp. (If you're finding the image below confusing, the blue patterned fabric is my ironing board.)

Iron seam allowance


5. Once you're turned it right side out, iron it nice and flat and turn in the seam allowance around the hole you left for turning. Pin the hole shut, then sew a topstitch around the entire perimeter of the work as close to the edge as you can, closing the hole. This is where you should double check how you have your machine threaded if you're using two colours of cotton - make sure your bobbin is the colour of the side you have facing down while sewing, and the other colour on top.

Close hole


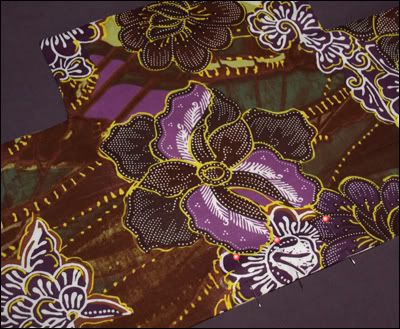
6. Now fold over the two flaps, iron and pin them in place. There should be a gap of about 1cm between them in the middle, as pictured below. Sew an L-shaped seam (marked in red), then turn and go back over the same seam, keeping as close to the edges as you can. Cut and tie off your threads and you're done!

Fold in flaps and sew


Congratulations! You are the proud owner of a personalised, funkadelic chequebook cover. Slide in the back cover of your chequebook and you're ready to go! Make them for friends and family - they're easy, quick and useful, and make a good gift for those who might be difficult to buy for (like my Dad). And you could definitely customise them more with appliques, embroidery, anything. :)

Chequebook covers
Chequebook covers


Good night all,

~Jessica

Discoveries: Wordle & COLOURlovers

Hello world,

I'm meant to be working on my Dad's golf programme but I couldn't help stopping by to post about these two websites I recently discovered.

Wordle

Pearl chapter 12 Wordle


This website has a simple concept but the results are great! You enter a block of text or a link to a webpage and then Wordle generates a 'word cloud' using the data you give it. You can choose the colours, the maximum number of words, the general arrangement guidelines, and so on. And it makes the words that are more common more prominent in the cloud. In my wordle above, I used the text from chapter 12 of my novella, Pearl. The main character is Wade, followed by his brother Sachiel, and they are at the Mermaids Pool. Notice how these words are larger?

Anyway, I was very excited to discover this. I thought it would be a really exciting thing in a novel, actually. Like, if I ever finish Pearl, then it'd be really interesting to create a wordle for each chapter so that when the reader looks at each one they get a confused glimpse into what's in store. Kewl, huh? I'm so doing that. Now all I need to do is finish the novella. Hmmph.

COLOURlovers

I was reminded of this website while I was fiddling with Wordle. You can define your own colour patelle for your word clouds, so I decided I wanted to find a nice palette to use. I found COLOURlovers while I was cruising One Pretty Thing a while ago. It will generate a colour palette for you from any image on the web. Here are some of the palettes I generated from artworks I've ed over on deviantArt:

PretendersLetting_goLagoon_MermaidAzorieMermaids_mummyNeon_Spiral_mermaidNot_a_mermaidFathom

Well that's it from me for now. Visit the sites. Enjoy!

~Jessica
Thursday, January 15, 2009

Apple and Banana Cozy Crochet Patterns

Hello world,

***Edit 31/1/2011***

And the winner is...

darlababe

Congratualtions Darla! I'll send you an email and soon your Eyespiral trading card will arrive in the mail. :)

Thanks everyone for posting and thanks to Kenmore for using my post in their ad and helping all you lovely people come find me.

***End edit***

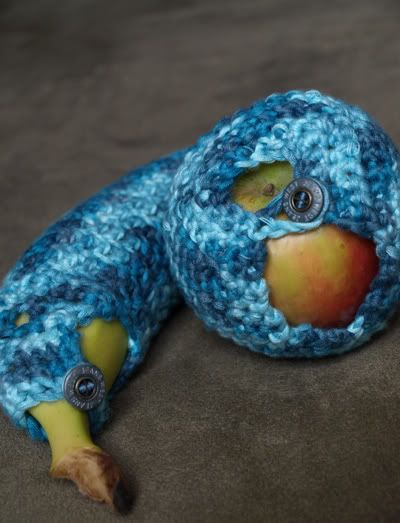
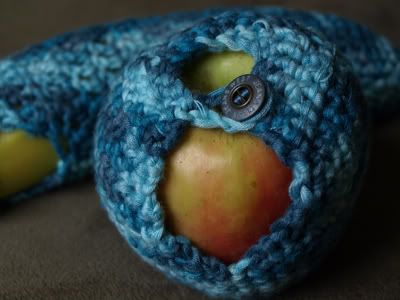
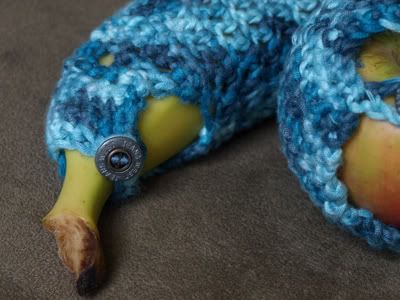
I finally bought some fruit to fill the cozies I made for my Mum for her birthday, and aren't they lovely?

Fruit cozies


The other good news is that the vegan lunch box gave me permission to post my crochet patterns which I adapted from her knitting patterns. If you'd like to find her knitting patterns, click the links for her apple cozies (there's three sizes!), banana cozy, and orange cozy.

But now for my crochet patterns. :)

Crochet Apple Cozy

Apple cozy


Click the image above to download my crochet apple cozy pattern. Please respect that it is not for commercial use.

Crochet Banana Cozy

Fruit cozies


Click the image above to download my crochet banana cozy pattern. Please respect that it is not for commercial use.

Et voila! I hope you enjoy the crochet patterns.

~Jessica