Hello world,
For those who don't know,
filet crochet is a type of crochet that is based on a mesh made of blocks that are either 'open' or 'closed'. Great for the mathematically minded like myself, and there are lots of tutorials online to show you how to get started with this. It can be done using larger hooks and thicker yarn to create blankets, or fine hooks and yarn to create something more akin to lace.
I have been searching for a tutorial on how to covert a photo into a filet crochet pattern and I couldn't find one, so I've decided to write one of my own! Read on to learn how to achieve this.
There are processes for creating a colour crochet blanket, etc, from a photo, however this is not what I wanted to do. I not-so-recently completed a gorgeous
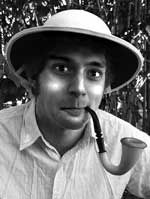
peacock filet crochet in Coates Mercer 100 cotton that once belonged to my great grandmother and it is just so lovely that I wanted to see where I could go with it. Unfortunately my drawing skills aren't amazing like
my brother Michael, so I needed to use my Photoshop skills instead of manually reproducing the photo. Oh, and I'll post a photo of the peacock soon.
I came up with the process because I am thinking of making an epic xmas gift, but because the person for whom I am making it may read this, I will say no more - for now. I wanted to make a filet crochet pattern from a photo. This is difficult for a number of reasons: Photos are high definition, they're in colour, and it is surprisingly difficult to figure out how to convert an image from colour to black & while only (i.e. with no greys).
However, I am determined, and like Photoshop, so here is the tutorial. I hope someone else out there on the world wide web finds it useful. :)
Step 1: Source your photo
Get your photo or image. Low-res is fine as filet crochet, unless making one of epic proportions, is also quite pixelated. What you want to focus on are images with high contrast. Striking patterns such as stripes, etc, are great for the background if you want them, but again contrast, not colour, is the key.
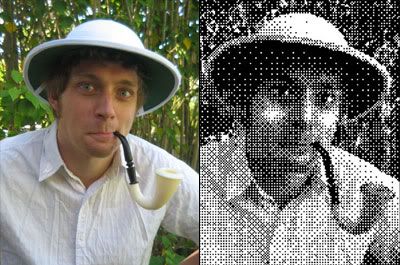
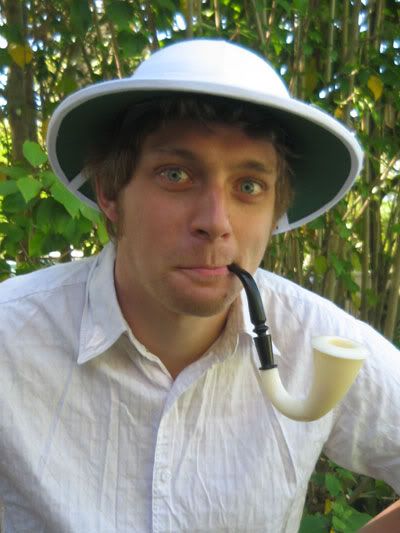
For this tutorial, I chose this loverly photo of my brother Tim, breaking most of the rules above. Not to worry, I embrace a challenge!
Step 2: Adjust and convert to greyscale
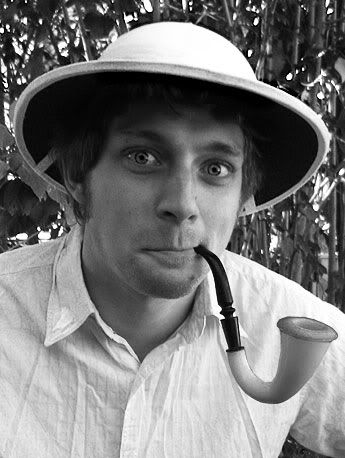
This step is about your own judgment. There's lots you can do to get the best outcome, but at the most basic here's what to do: Crop as much as you can. Don't waste space with background if you don't need to unless you have plenty of time and yarn on your hands, else you will regret it later. Then select 'Layer > New Adjustment Layer > Black & White'. Fiddle around with the various sliders to get the effect that you want - remember you want to maximise whites, blacks, and have minimal greys.
I have Photoshop CS3 and I understand the 'Black & White' feature doesn't exist on some earlier version of Photoshop - in this case, select 'Hue/Saturation' instead and also create an additional 'Brightness/Contrast' layer to give yourself more control.
As I said, there are lots of things you can do to further enhance your image at this stage. To get the below image, I used 3x brightness/contrast layers to improve the definition of the end of the pipe and the overall contrast of the image, plus I used the burn/dodge tool to add definition at the brim of his hat and the eyes, then used the black & white adjustment layer and played with the sliders.
Step 3: Resize
At this stage you need to decide how large and how detailed a crochet pattern you want - each pixel becomes an open or closed block in the filet crochet mesh. The smaller the image resolution, the faster and easier crocheting it is, but the larger the better detail you get. To give you a notion of size vs. pixelage, I am currently working on an image approximately 300 x 150 px using a tiny crochet hook and
size 100 yarn and it is looking to turn out about 1 x 0.5 metres in size, so look out.
For this tutorial, I resized the image to 150px width. Lower would lose too much detail and leave me with a greyish mess. I noticed my contrast wasn't great, so I decided to zoom right in and do some more work with the dodge/burn tools to improve the contrast I wanted. I know the below may look silly, but the end result can be greatly influenced by the modifications you make here.
To resize an image in Photoshop, select 'Image > Image size...' and input the settings you desire.
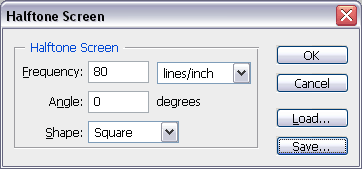
Step 4: Convert to halftone
The bitmap halftone screen is how to reach a workable filet crochet pattern. To do this you need to complete two steps:
- Select 'Image > Mode > Grayscale' and click OK to flatten and discard all colour information.
- Use Image > Mode > Bitmap', leave the resolution as is and select the 'Halftone screen' method with the below settings, or download my settings and load them into Photoshop:
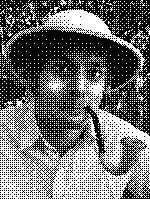
Click OK and in essence you've got your pattern. Here's mine at both 100% and zoomed in so you can see the pattern better.
Step 5: Save the image
Press Ctrl+Alt+Shift+S to bring up the 'Save for web' or 'Save for web and devices' dialogue box. Save the image as a GIF file and it'll have a tiny file size due to being plan black & white. There's no need for transparency.
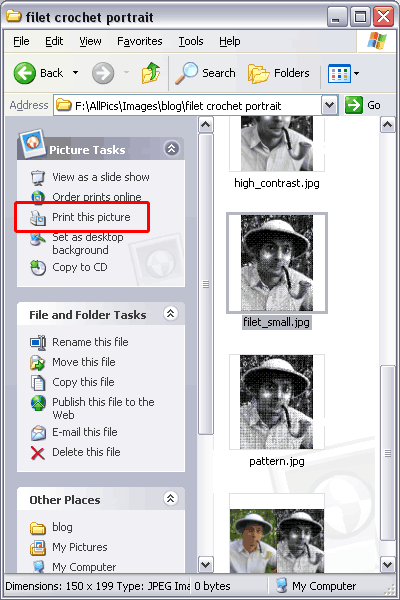
Step 6: Print and add grid
If you're nifty and/or OCD like myself, you can add a grid and resize the image before printing. However, in hindsight it is much easier to do it using the built-in Windows print picture function and add the gridlines yourself.
To print the image ready for use, go the the folder where you have the image saved, click the file so it is selected and then select 'Print this picture' from the folder options
Then follow the prompts. When it gets to the 'Layout selection' step, select 'Full page prints' as shown below.
The image will print and really you can go ahead with just this. However, I always like to have my gridlines there to make sure I get the stitch count right, so to achieve this I recommend grabbing a mechanical pencil (for the fine tip and silver colour which will show up on both the black and white parts of the image) and a ruler and get to it. Another good idea is to rule a gridline of double thickness every 5 or 10 blocks to make keeping count easier.
Et voila!
You have now got a filet crochet pattern from a photograph. Congratulations! If you make one, I'd love to see! I promise I will post a photo of mine when it is done and gifted away. :)
----------UPDATE JANUARY 2013----------
I ended up making this portrait for my brother for xmas just passed. Here's a photo of the finished product:
-------END UPDATE JANUARY 2013-------
Well I hope this was useful. Ooh, and if you're interested, here is a peek at the pattern for the peacock that I finished a while ago:
Au revoir!
~Eyespiral